As good as the Windows 10 operating system is, Windows computers still have the problem of running much more slowly over time. In this article, you’ll learn seven of the most effective ways to clear out old memory and boost available RAM in a Windows machine that’s suffering from performance issues. Also, if you want a quick run-down, check out our YouTube video from our sister site, Online Tech Tips. If you like the video, make sure to subscribe to the channel!
Why Computers Slow Down
If you’ve owned your computer for a while, there are any number of issues that can cause it to slow down. Many of these are out of your control, but a few aren’t. These issues include:
Memory leaks from software you’ve installedPower surges and normal usage degrading system componentsBad hard drive sectors or bad memory chips due to age and useNot installing enough RAMExcessive software launching at startupMalware and viruses consuming system resources
Even though you can’t control the effects of normal aging, there’s a lot you can do to speed up your computer. These include things like defragmenting your hard drive, performing virus scans, and disabling the User Account Control (UAC). However, the most significant effect you can have on system performance is making sure your memory usage is fully optimized.
1. RAM Hogs: Low Hanging Fruit
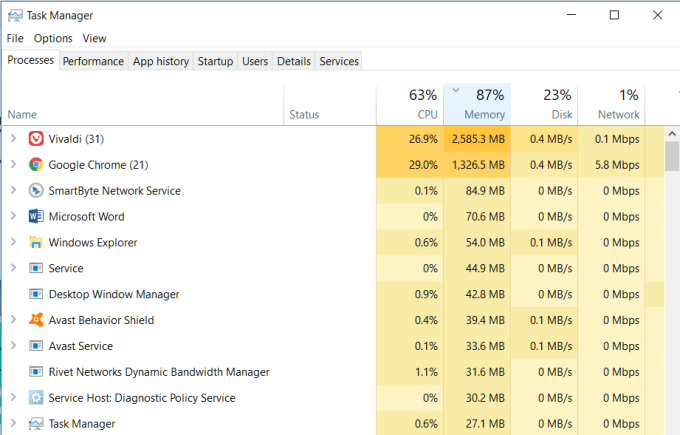
The fastest and easiest way to clear up memory that’s being used is to make sure there are no system processes consuming all the system resources. This is an easy problem to develop over time, especially if you’re in the habit of installing a lot of software. There’s also a very easy solution. Check the system processes listed in the Task Manager and look for problem applications you don’t recognize that are consuming excessive RAM. If you spot any problem applications, go into the Control Panel, click on Programs and Features, and uninstall those problem applications.
2. Clean Up Startup Programs
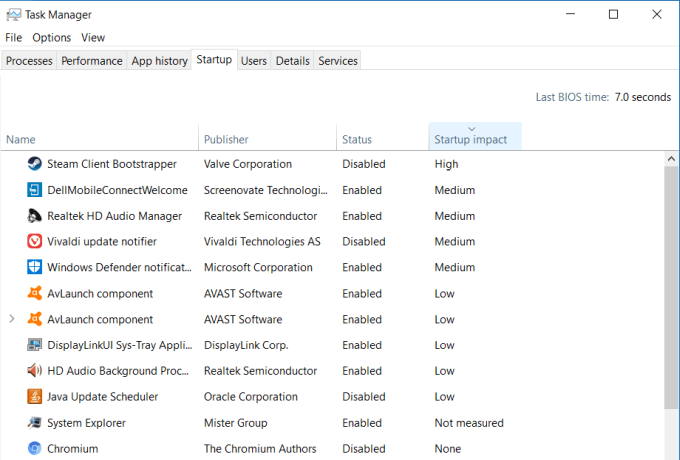
Unfortunately, resolving memory issues and freeing up your RAM is not usually that easy. Over time, software you’ve installed and forgotten about can get embedded into your system but may not consume RAM constantly. In these cases, these programs won’t show up at the top of the list in the Task Manager. However, they are part of the list of programs that launch every time your computer starts and contribute to chewing away at your available RAM. When each of these programs launch, they devour a bit of memory individually. They all run in the background and consume your RAM. Disabling them from running at startup prevents this from happening.
3. Clear Page File at Shutdown
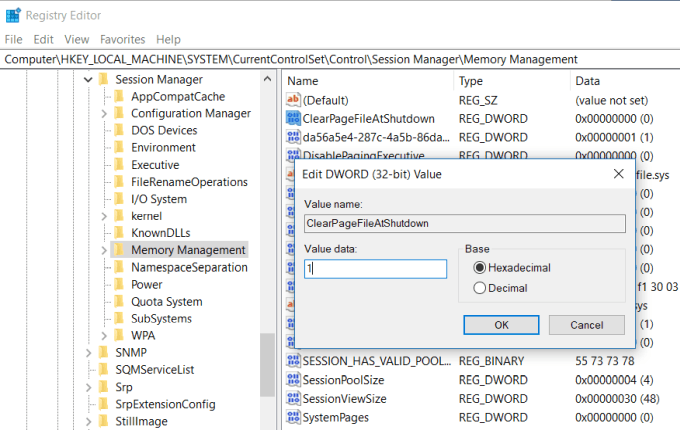
Whenever you shut down your computer, the system RAM is always cleared. However, the page file that’s stored on the hard drive isn’t. The page file is an area of the physical hard drive that the operating system uses as extra RAM when the physical RAM is full. Ensuring that the page file is cleared just like RAM is will keep things clean and efficient the next time you start your computer. You can enable this by setting the ClearPageFileAtShutdown registry key to 1. Windows 10 has this set to 0 by default. Enabling this is easy. The next time you restart your computer, the page file will clear.
4. Check for Device Driver Issues
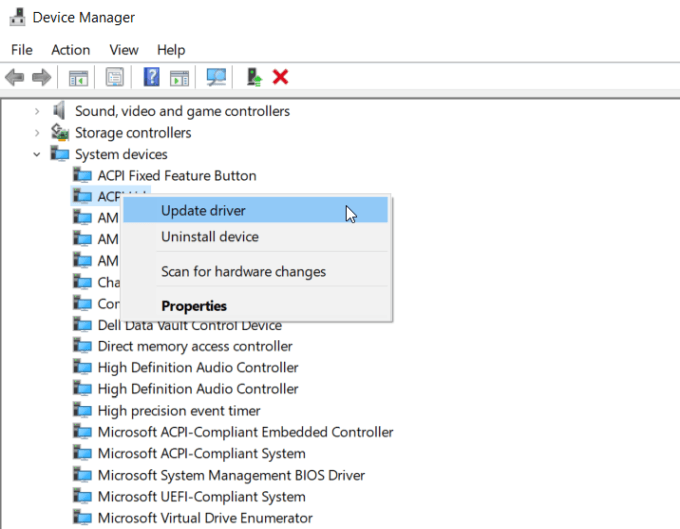
Over time, device drivers become updated, and various Windows updates could lead to corrupt driver files or driver conflicts. These issues can sometimes lead to memory leaks and the longer your computer is running, could lead to excessive RAM consumption. It’s important to make sure your system is clear of device driver issues. You can check this quickly by using the Device Manager. Try to let the system look for latest drivers online if you can. Otherwise you’ll need to visit the manufacturer website and download the latest driver. Keeping any device issues clear and all your drivers updated will ensure your system is running smoothly and drivers aren’t causing memory issues.
5. Reduce Windows Visual Effects
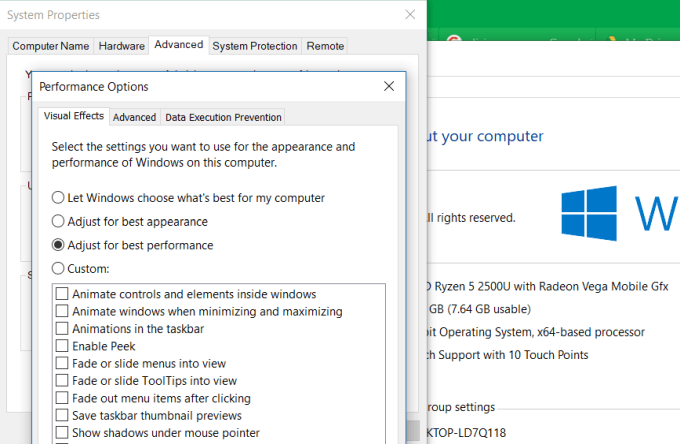
Windows 10 comes with a lot of busy visual effects for windows, menus, tooltips and more. If you have plenty of RAM, these visual effects aren’t an issue. But if you’re running with a bare minimum of available RAM, disabling these effects can significantly increase available memory. To disable Windows visual effects: You’ll notice that all the animated features are disabled with this setting. If you want, you can instead select Custom, and then enable any of the visual effects that you can’t live without.
6. Flush Memory Cache
When you open and close applications frequently, sometimes certain programs don’t properly release system memory when closing. Over time, these orphan threads consume RAM and lead to slow system performance. There is a very simple shortcut you can create that’ll flush the memory cache and clean out all those old cobwebs of lost memory. This shortcut is: %windir%\system32\rundll32.exe advapi32.dll,ProcessIdleTasks If you’re not sure how to configure this shortcut, you can read a guide to flushing the memory cache that’ll walk you through all of the steps.
7. Add More RAM
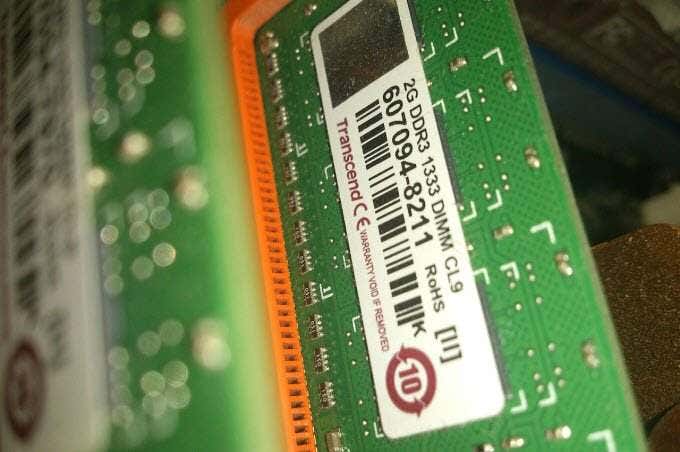
Of course, one of the easiest ways to free up more memory is to boost the existing amount of RAM you have. If you’re not sure what kind of memory your computer takes, you can use the Crucial Advisor to run a scan on your PC and find the best memory to buy. Scans are fast and easy, and the resulting web page will list all memory cards that are available for your system.
Memory Is Important
Of all the things you can do to boost your old computer’s performance, there is nothing as effective as clearing out or boosting your available RAM. The less your computer needs to rely on your hard drive and the page file because the physical RAM is full, the faster your computer will behave.
