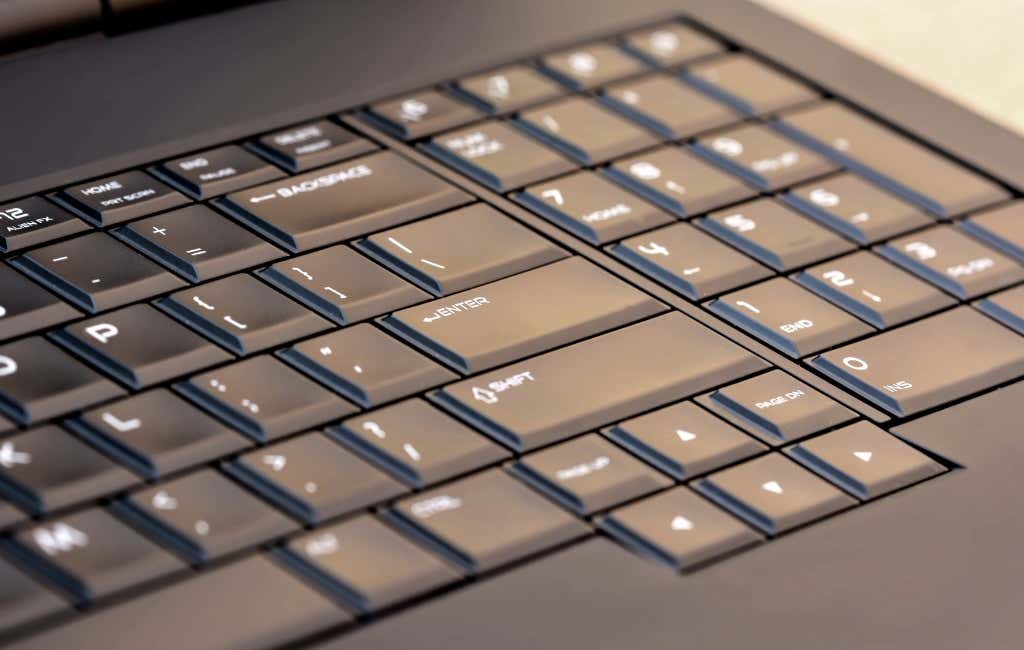
You may want to prevent others from accidentally pressing keys on your laptop and possibly cause data loss or corruption. You could also disable the keyboard when cleaning out your laptop to remove accumulated dust or debris. Your laptop keyboard may also be damaged from a spill or broken. In this case, you may need to use another keyboard instead of your laptop keyboard. Whatever the reason, we’ll show you different safe methods you can use to disable the keyboard on a Windows 10 laptop or MacBook.
Disable a Windows Laptop Keyboard
You can disable a laptop keyboard in Windows 10 using:
Device ManagerDevice installation restrictionAn incompatible driver
Disable a Laptop Keyboard Using Device Manager
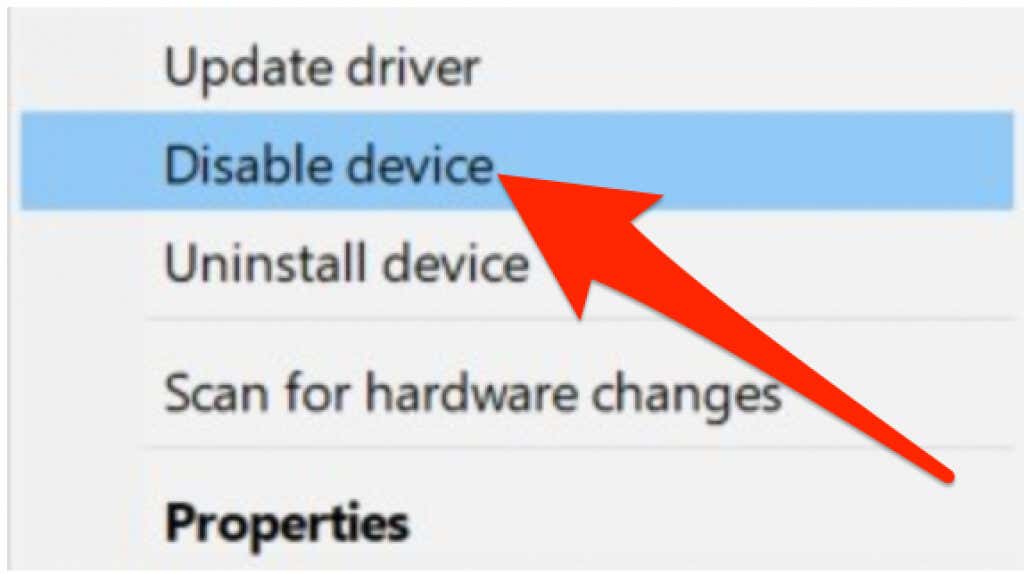
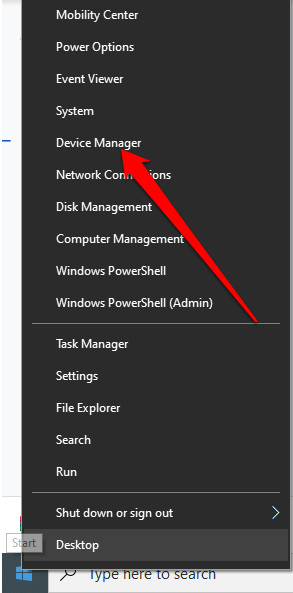
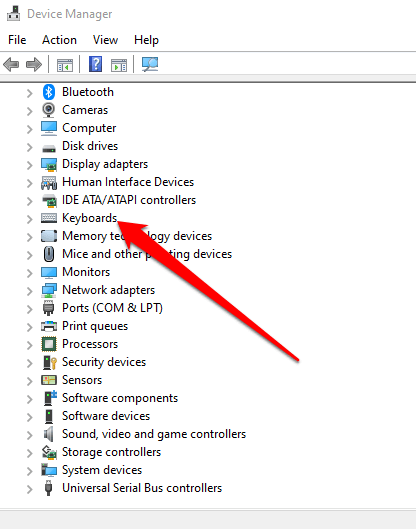
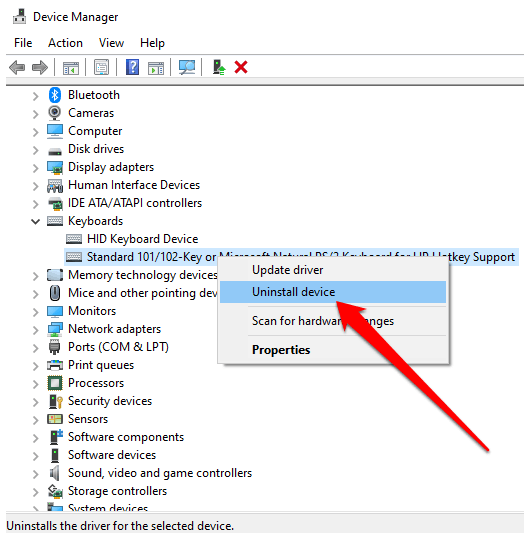
Device Manager is a Windows tool that shows a graphical view of all the hardware installed in your laptop. You can use it to see and manage the hardware devices along with their drivers. You can quickly and safely disable your laptop’s keyboard using Device Manager, though it may not work for all laptops. Note: Restart your laptop if the keyboard isn’t disabled immediately.
Use Device Installation Restriction to Disable a Laptop Keyboard
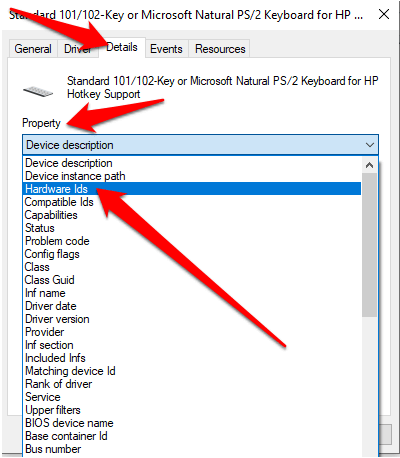
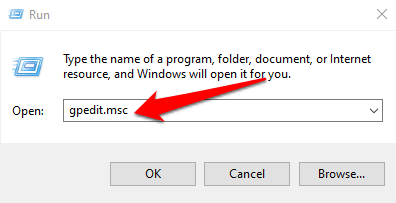
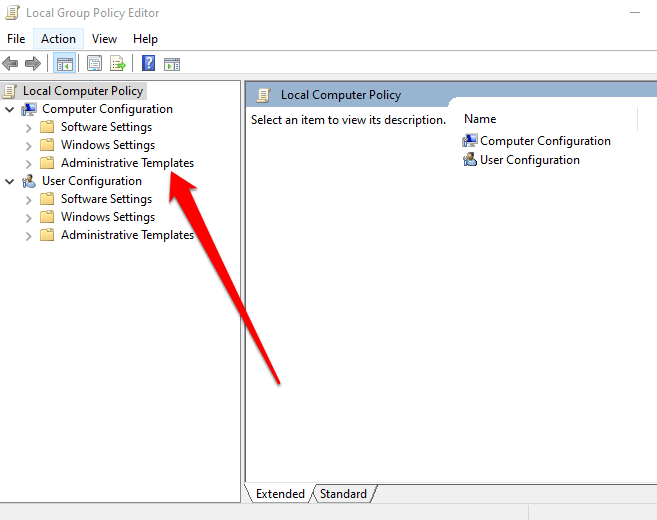
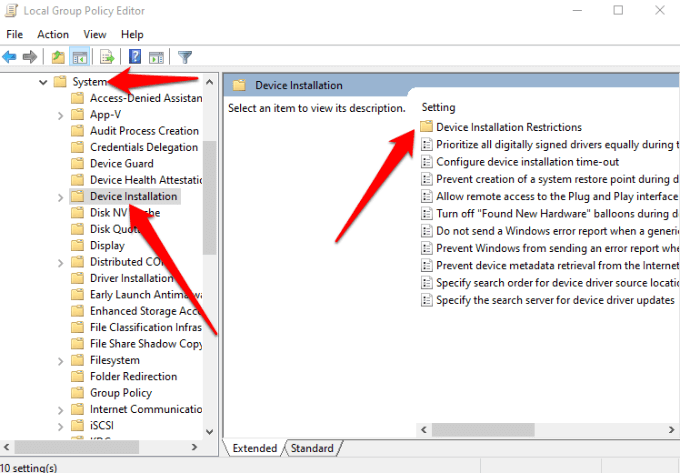
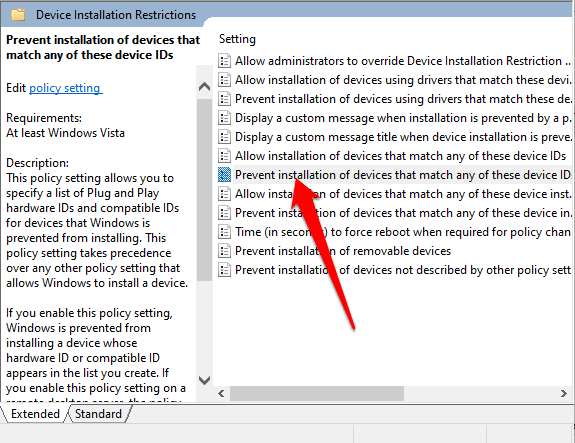
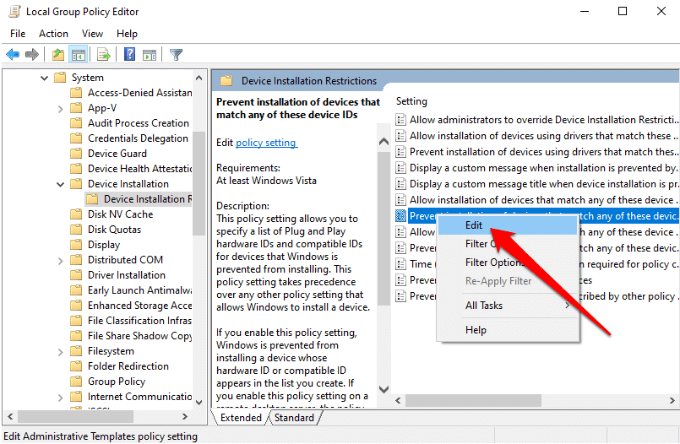
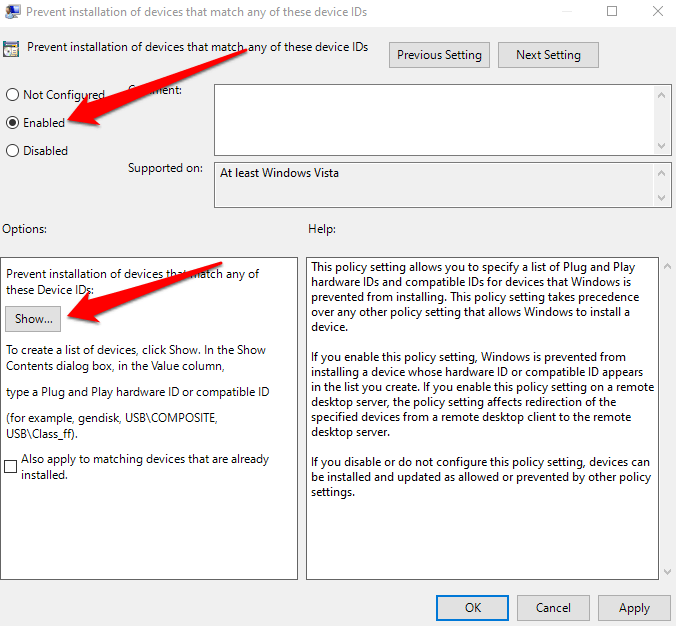
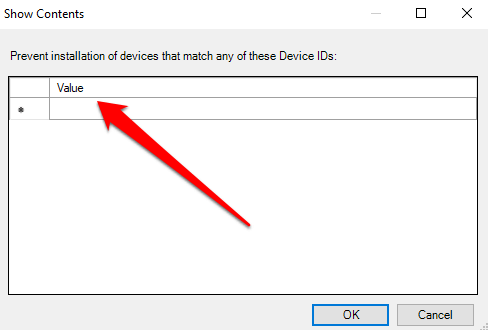
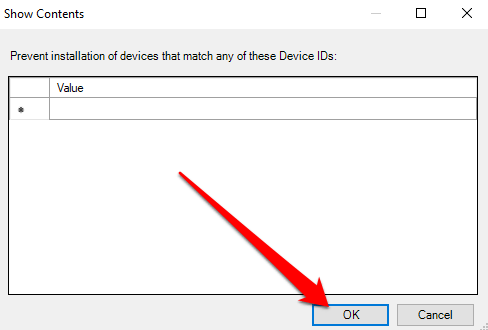
If you can’t use Device Manager to disable the keyboard on your laptop, you can enable a hardware installation restriction via the Group Policy Editor. Doing this stops your keyboard from being reinstalled each time your computer starts up. Note: You need to know the keyboard’s hardware ID, and then you can tell the Group Policy Editor to prevent Windows from installing devices associated with that ID. Restart your laptop to disable the keyboard. Note: Repeat steps 11 and 12 with other hardware IDs on the list. The ID you used probably didn’t work, so it’s good to be sure by adding each ID from the device list. If you want to undo the restriction installation, turn on the keyboard, set the policy to Not Configured in the Group Policy Editor, and restart your laptop.
Use an Incompatible Driver to Disable the Laptop Keyboard
You can also disable a laptop keyboard by forcing it to use an incompatible driver. We don’t recommend using an unorthodox method because it may cause a BSOD or other issues. Plus, if the same driver controls the keyboard and touchpad, you’ll lose the functionality of both. However, it’s a viable option when it’s necessary to disable the keyboard, and the other two methods don’t work. After the laptop restarts, the keyboard will cease to function. Note: You can re-enable it by repeating the first two steps but select Search automatically for drivers instead.
Disable a Laptop Keyboard on a Mac
If you’re using a MacBook, you can disable a laptop keyboard, albeit temporarily using Mouse Keys or a third-party keyboard utility app.
Disable a Laptop Keyboard on a Mac Using Mouse Keys
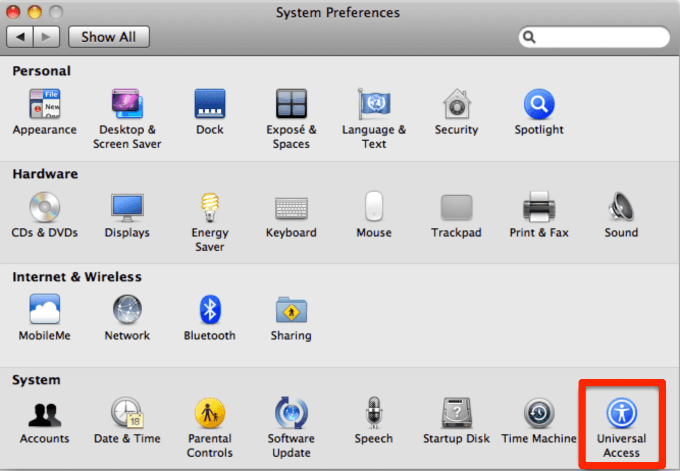
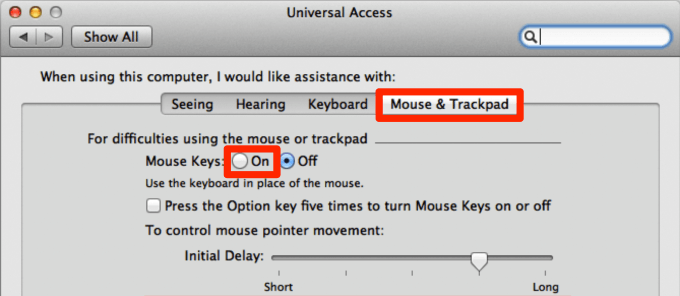
You can use the Mouse Keys setting to disable a laptop keyboard in older versions of macOS. In newer versions, it will only disable the trackpad. Enabling Mouse Keys disables the keyboard and makes specific keys available for you to move the mouse pointer. The overall goal is to prevent accidental typing or unwanted input. Note: The Mouse Keys setting is available in macOS Big Sur, but you can’t use it to disable the keyboard.
Disable a Laptop Keyboard on a Mac Using a Third Party Tool
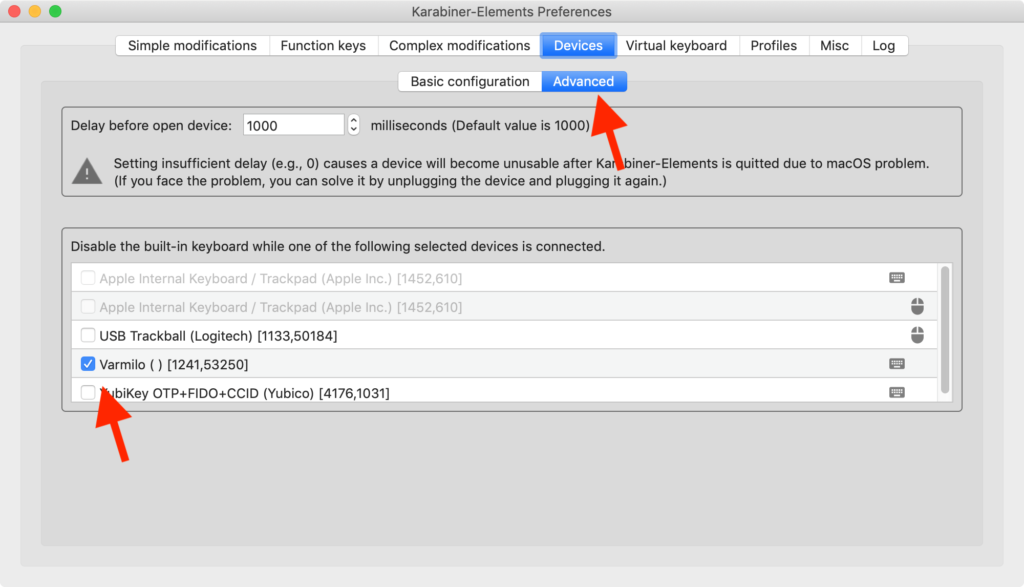
Using the Mouse Keys setting disables other keys temporarily on your keyboard. But, it only works with older macOS versions. With a third-party app like Karabiner-Elements, you can disable your keyboard without locking the screen or your laptop. Under the Advanced settings, you can have it disable the built-in keyboard when another device is connected.
Prevent Accidental Typing and Unwanted Input
Disabling your laptop’s keyboard has several advantages. You can replace your built-in keyboard, preserve its quality, or keep curious fingers from accidentally typing unwanted characters. We hope you were able to disable your laptop’s keyboard using the steps in this guide. Leave a comment and let us know what worked for you.
