Work your way through the following list of troubleshooting methods and you should be able to fix problems with AirDrop not working from iPhone to Mac.
Check for Mac Compatibility
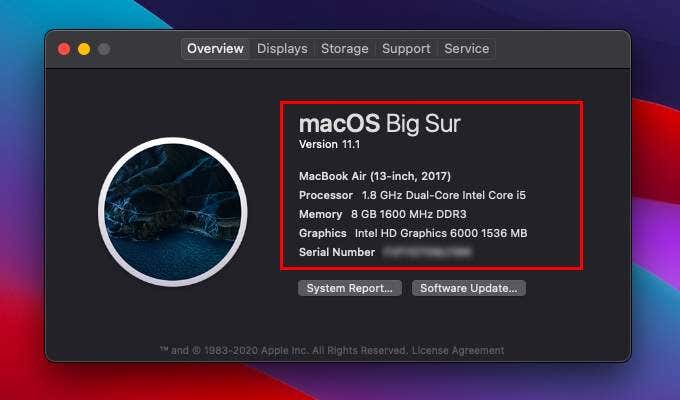
An iPhone can only AirDrop to a Mac introduced in 2012 or later (the 2012 Mac Pro is an exception). Additionally, your Mac should run at least OS X 10.10 Yosemite. Open the Apple menu and select About This Mac to check your Mac’s model and operating system version.
Enable Bluetooth and Wi-Fi (Mac and iPhone)
You must enable Bluetooth and Wi-Fi on both the Mac and the iPhone for AirDrop to run without issues. You don’t have to connect the devices to a Wi-Fi network, however.
Enable Bluetooth and Wi-Fi on Mac
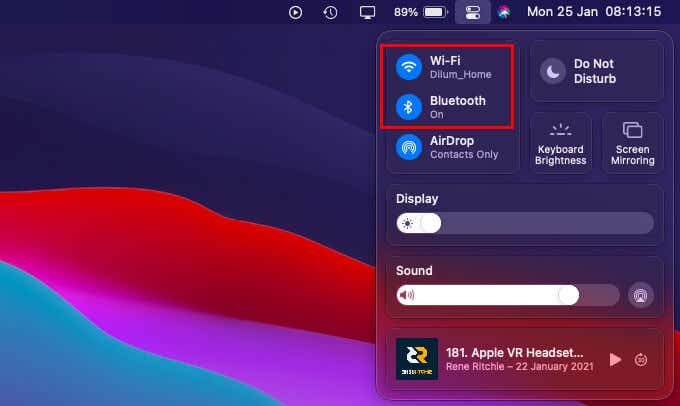
Open the Bluetooth and Wi-Fi status menus via the Mac’s menu bar or Control Center. Then, turn on both Bluetooth and Wi-Fi.
Enable Bluetooth and Wi-Fi on iPhone
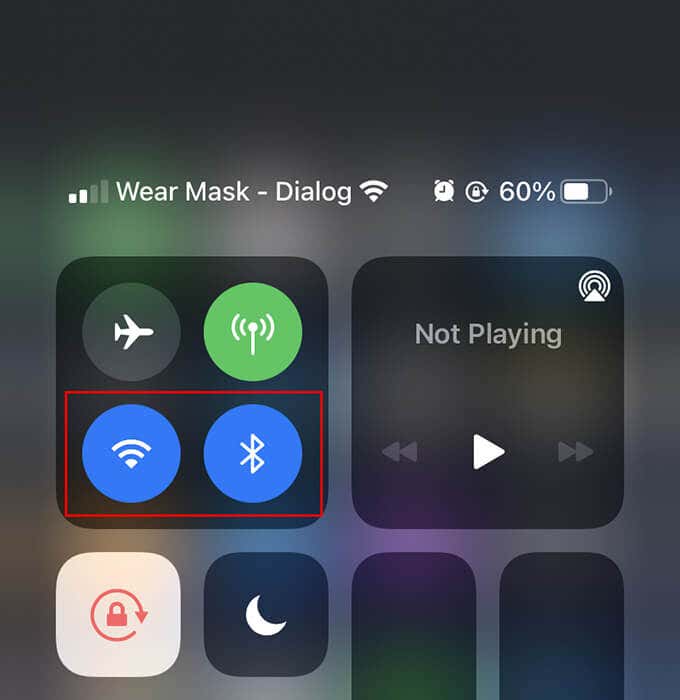
Open the iPhone’s Control Center by swiping down from the top-right of the screen. If you use an iPhone with Touch ID, swipe up from the bottom of the screen instead. Then, turn on both Bluetooth and Wi-Fi.
Bring Mac and iPhone Closer
Both the Mac and the iPhone should be at least 30 feet close to each other. If not, files can fail during transfer, even if the iPhone detects your Mac.
Disable Personal Hotspot on iPhone
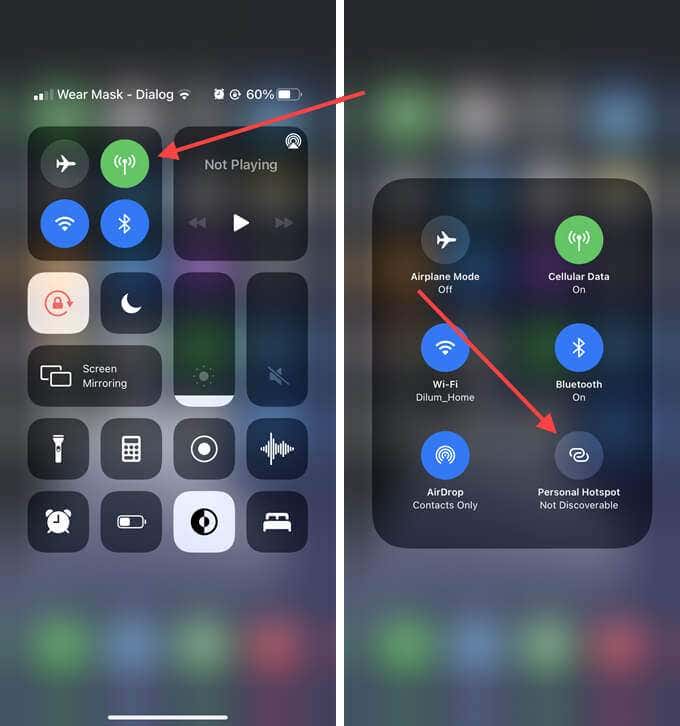
If the iPhone has an active Personal Hotspot, try disabling it. Open the Control Center on your iPhone, long-press the Cellular icon, and set Personal Hotspot to Not Discoverable.
Open Finder Window on Mac
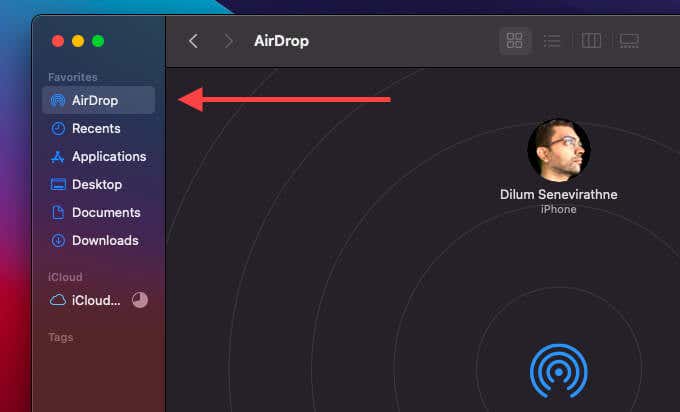
Sometimes, AirDrop will fail to kick into gear on your Mac unless you open an AirDrop window. To do that, simply bring up Finder and select AirDrop on the sidebar. Then, resend the files from the iPhone.
Disable Do Not Disturb on Mac
Do you have Do Not Disturb turned on in your Mac? Not only does that block AirDrop notifications from working, but it can also cause issues with discoverability. Open the Mac’s Control Center and disable Do Not Disturb. If you use macOS Catalina or earlier, you must open the Notification Center instead to switch it off.
Set AirDrop to Everyone on Mac
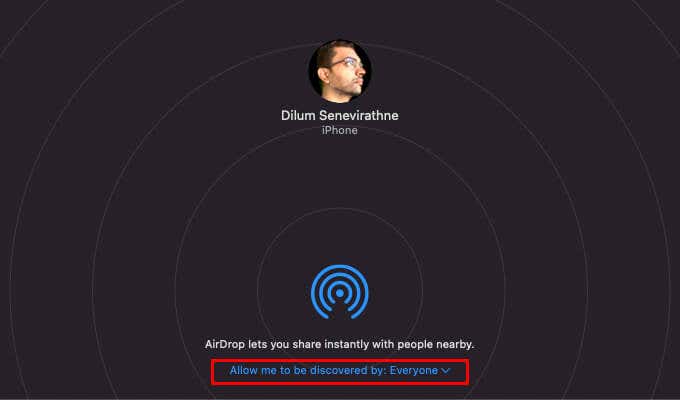
By default, the receiving permission in AirDrop is set to Contacts Only. If you’re trying to send a file to your Mac from an iPhone that you own, that should not cause issues. However, if you want to receive a file from someone else’s iPhone, it’s best to change that to Everyone even if you have the person listed within the Contacts app. To do that, open an AirDrop window. Then, set Allow me to be discovered by: to Everyone. If that worked, remember to set it back to Contacts Only to avoid being bombarded by AirDrop requests later on.
Turn Wi-Fi and Bluetooth Off/On (Mac and iPhone)
Try disabling and re-enabling Bluetooth on both the Mac and iPhone. That often takes care of minor technical glitches that prevent AirDrop from sending or receiving files.
Disable and Enable Wi-Fi/Bluetooth on Mac
Open the Bluetooth and Wi-Fi status menus on the Mac’s menu bar or Control Center. Then, disable both Bluetooth and Wi-Fi. Wait for a few seconds and re-enable both options. Disable and Enable Wi-Fi/Bluetooth on iPhone Open the Settings app on the iPhone. Then, select Wi-Fi and turn off the switch next to Wi-Fi. Go back to the previous screen, select Bluetooth, and turn off the switch next to Bluetooth. Wait for a few seconds and re-enable Wi-Fi and Bluetooth.
Restart Mac and iPhone
If you still keep running into issues with AirDrop not working from iPhone to Mac, try restarting both devices. That’s another way to get rid of any software-related snags that cause problems with AirDrop.
Reset Network Settings on iPhone
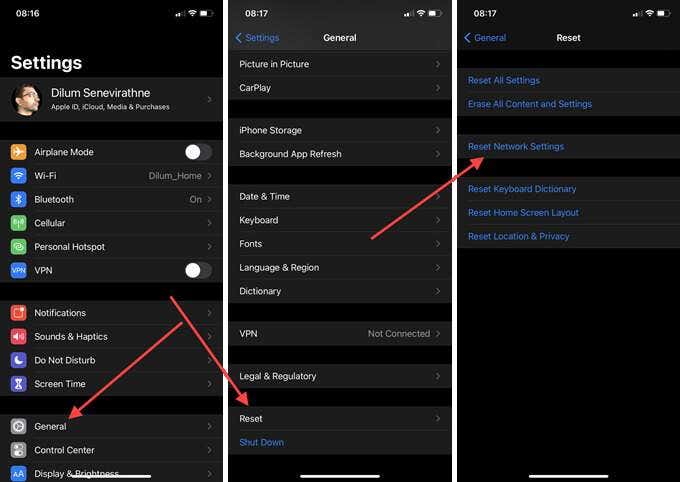
If possible, perform a network settings reset on the iPhone. That should resolve any issues caused by corrupt Bluetooth or Wi-Fi settings preventing the device from sending files to your Mac.
- Open the Settings app.
- Select General.
- Select Reset.
- Select Reset Network Settings.
- Select Reset Network Settings again to confirm.
Delete Bluetooth/Wi-Fi PLIST Files and Mac
You can also attempt the equivalent of a network settings reset on the Mac by deleting the Property List (PLIST) files related to Bluetooth and Wi-Fi. Your Mac should automatically recreate the files after you restart it.
Delete Bluetooth PLIST Files
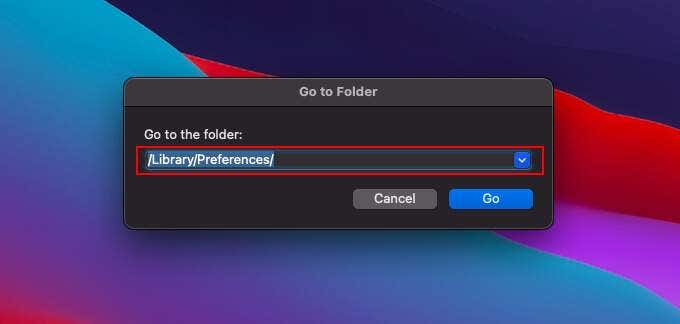
- Open Finder. Then, select Go > Go to Folder.
- Type the following path and select Go: /Library/Preferences/
- Control-click the following file and select Move to Trash.
com.apple.Bluetooth.plist
Delete Wi-Fi PLIST Files
- Open Finder. Then, select Go > Go to Folder.
- Type the following path and select Go: /Library/Preferences/SystemConfiguration/
- Control-click the following files and select Move to Trash.
com.apple.airport.preferences.plistcom.apple.network.identification.plistcom.apple.network.eapolclient.configuration.plistcom.apple.wifi.message-tracer.plistNetworkInterfaces.plistpreferences.plist
Allow All Incoming Connections (Mac)
If you have the Mac’s firewall turned on, it may end up blocking all incoming connections. Make sure that isn’t the case.
- Open the Apple menu and select System Preferences.
- Select Security & Privacy.
- Select the Firewall tab.
- Select Click the lock to make changes and enter your administrator password.
- Select Firewall Options.
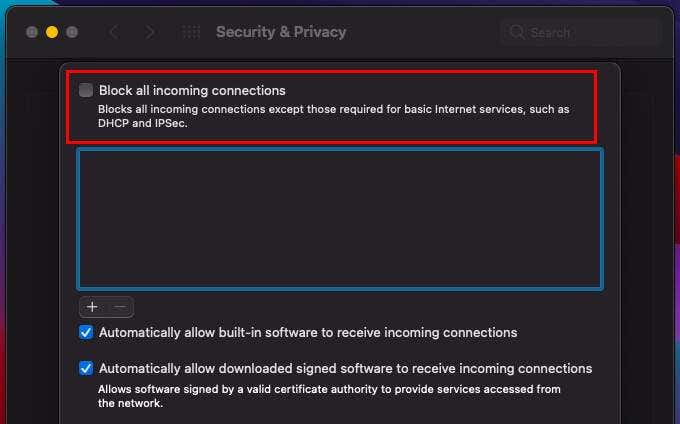
- Uncheck the box next to Block All Incoming Connections and select OK.
Update Mac/iPhone
You may also want to update your Mac and iPhone. The latest updates typically come with fixes for known bugs and issues, so install them if you haven’t in a while.
Update Mac
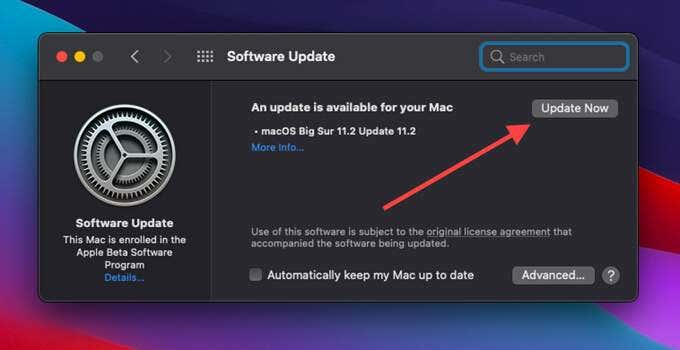
Open the Apple menu and select System Preferences. Then, choose Software Update. If you see any pending updates, select Update Now.
Update iPhone
Open the Settings app, and then go to General > Software Update. If you see any pending updates, tap Download and Install to apply them.
Reset NVRAM (Mac)
Resetting the NVRAM (non-volatile random-access memory) on your Mac is another way to fix persistent connectivity-related issues. Start by turning off your Mac. Then, turn it back on and immediately press Option+Command+P+R until you hear the startup chime for the second time. If you use a Mac with a T2 Security Chip, you must hold them down until the Apple logo shows up and disappears twice. After booting into your Mac, you must re-configure settings such as the time zone, volume sound, and keyboard preferences. For a complete walkthrough, here’s how to reset the NVRAM on a Mac.
Success: Sent and Received From iPhone to Mac
Troubleshooting issues with AirDrop not working on the Mac and iPhone can be rather tricky since you usually can’t isolate the problem to a single device. Despite that, something as simple as opening an AirDrop window, turning off/on Bluetooth and Wi-Fi, or changing AirDrop permissions to Everyone should almost always get things working again.

