Users can choose from three built-in indentation styles in Microsoft Word. We’ll discuss why you’d want to choose each one, how to select and apply an indentation style to your document, and how to fix hanging indentation that isn’t working the way you want.
3 Styles of Indentation in Microsoft Word
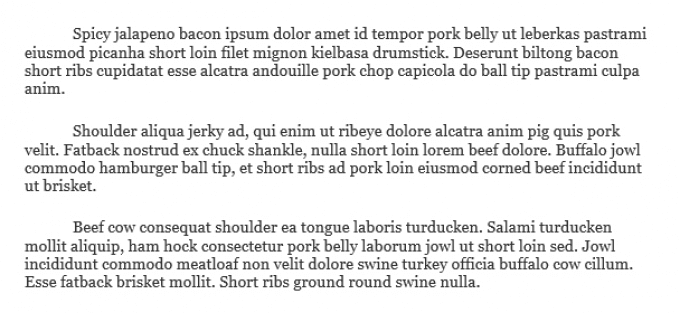
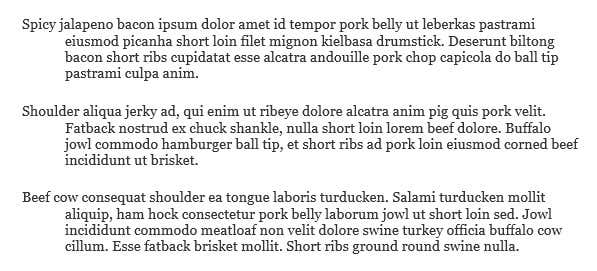
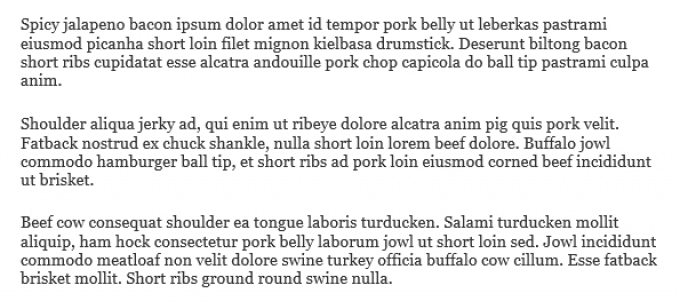
Microsoft Word offers three styles of indentation:
First-line indentHanging indentNo indent
First-line indent is a style you often see in books and newspapers. The first line of every paragraph is indented. Hanging indent is most commonly used for citations. If you’re writing a bibliography or works cited in the Chicago, APA, or MLA citation styles, you’ll use the hanging indent. No ident is the default indentation style for Microsoft Word documents. Every line of your paragraph will be the same distance from the left margin. This indentation style is frequently found in business documents, from letters to reports. Ultimately, it’s up to you to decide which indentation style works best for your document.
Selecting an Indentation Style
Selecting an indentation style in Microsoft Word is simple. You can set an indentation for the current paragraph or for the entire document.
How to Set an Indentation Style on Windows
If you’re using the Microsoft Word application on a PC running Windows, follow these steps to set an indentation style. Note: If you choose First-line or Hanging indents, you can adjust how far the line will be indented under By.
How to Set an Indentation Style on Mac
The steps are largely the same for Mac users. Again, if you choose First-line or Hanging indents, you can adjust how far the line will be indented in the By section.
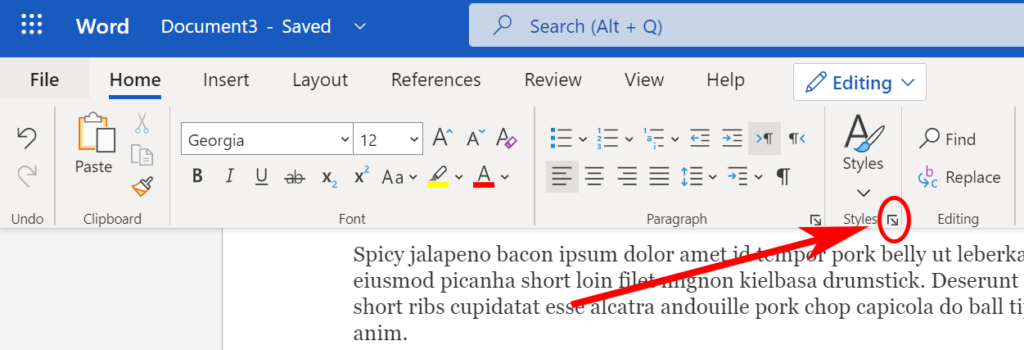
How to Set an Indentation Style on the Web
If you’re using Microsoft Word in a browser, here’s how to set an indentation style.
How to Indent a Single Paragraph Using the Tab Key
If you want to apply a First-Line Indent to a single paragraph, here’s the easiest way. The first line of the paragraph will be indented, and you’ll see a tab stop on the ruler, showing you the exact depth of the indent.
How to Use the Ruler to Indent
You can use a tab stop on the ruler to apply a first-line indent to a single paragraph or every paragraph in the document. On the desktop app, check the box to display the Ruler.
How to Set Left and Right Indents
If you want to indent all lines of a paragraph a set distance in relation to either the left or right margin, here’s how.
How To Make First Line Indent the Default
By default, Microsoft Word will not indent paragraphs. If you’re using the desktop app for Windows or Mac and you want to make first-line indent the default, follow these steps:
What are Mirror Indents?
You may have noticed the checkbox for Mirror indents in the image above. When that box is checked, you’ll notice that the Left and Right Indentation settings change to Inside and Outside. The idea is that you can apply indentation relative to the inside or outside margin for a two-sided printed book. That way you can prevent text from being obscured by the book’s binding. However, if you’re designing the layout of a book, you should be using a page layout program like Adobe InDesign or Quark Xpress. Just because you can do something in a word processor like Microsoft Word doesn’t mean you should. Therefore, we recommend leaving the Mirror indents box unchecked.
The Increase and Decrease Indentation Buttons
Microsoft Word also provides buttons to quickly increase or decrease the indentation of the current paragraph. These buttons move the entire paragraph farther away from the margin or closer to it. Access these buttons in the Paragraph section of the Home menu, regardless of whether you’re using the desktop app or the browser version of Microsoft Word.
Go Forth and Indent As You See Fit
Now you know more than you ever thought you would about indenting paragraphs in Microsoft Word. Give yourself a pat on the back.


