In this article, we want to explain to you how you can improve your color accuracy, brightness and contrast straight from within Windows 10. We will also offer some tips on how you can set up the best settings for your particular monitor model and we’ll be showing how both AMD and Nvidia offer some great display control settings too.
Good Display Quality Setting Starts With a Good Monitor
If a high quality display with accurate colors matters to you, the place you should start is the monitor itself. If you have a cheap monitor you may be missing out on better color accuracy, higher brightness, and better contrast. Below, we have picked out three affordable options that are specifically well known for their excellent display quality at their price points. Keep in mind that professional grade photo editing displays can cost far, far more, but we have focused on affordable options here. If you can’t afford to purchase a new monitor, you can skip this section.
BenQ GW2270 1080P 21.5” – $89
This monitor is very affordable and it features great color accuracy and contrast. The monitor also uses flicker free technology to reduce the strain on your eyes and improve your experience whilst watching video content or playing video games. This model doesn’t have speakers, but a version for $109 does have speakers and HDMI support.
ASUS PB278Q 27″ – $229
If you can afford it, the ASUS PB278Q 27″ monitor is a great option for those looking for lifelike colors and a larger display. This monitor has a 2560 x 1440 resolution, which is better than HD, and it also has an excellent viewing angle. Around this price range, you’ll struggle to find a monitor with a better quality display, especially not at this size.
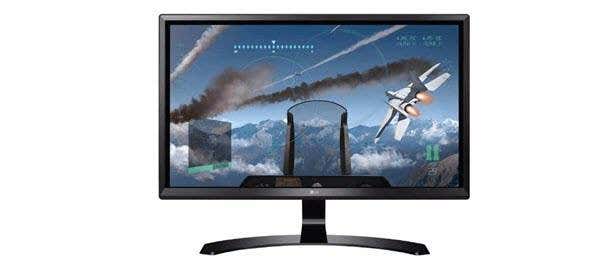
LG 24UD58-B 24” – $279
The LG 24UD48-B is the next step up for anybody that wants excellent colors, FreeSync, incredible brightness, and a 4K resolution. At this price point, this is easily the best choice if you are specifically after a 4K monitor that still delivers when it comes to color accuracy.
How To Calibrate Your Monitor For Better Colors
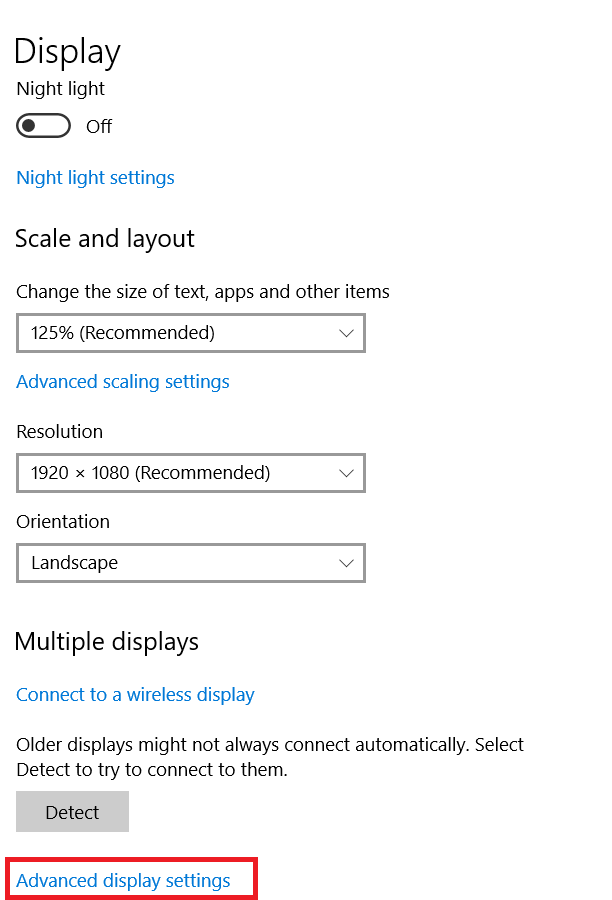
Whether you choose to purchase a new monitor or stick with your current one, the next step is to calibrate your monitor by using the built in color and display settings. Most of the time, the default settings are reasonable, but after extensive testing from the community, you can often find better settings tweaks online. Because there are thousands of different monitor models online, I won’t be able to explain how to optimize your own monitor settings. Instead, I can help to guide you through finding suitable settings online for yourself. First, bookmark this page so that you can come back later for the next steps. After that, look at your monitor for the correct model name. It may be printed on the front of your monitor. Alternatively, you can press the Windows key and search for Display. Click Change display settings in the search results. On the display settings page, click Advanced display settings.
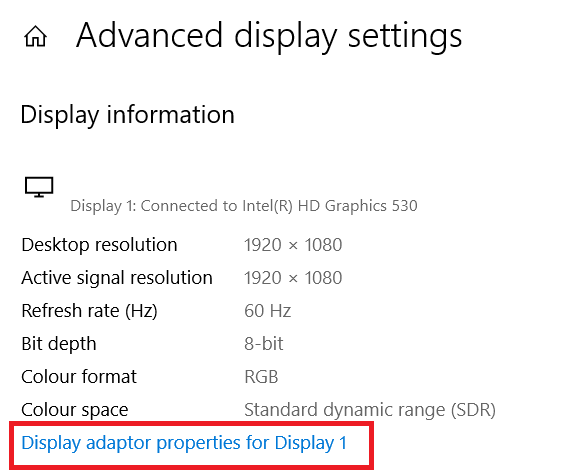
On the next page, click Display Adapter Properties.
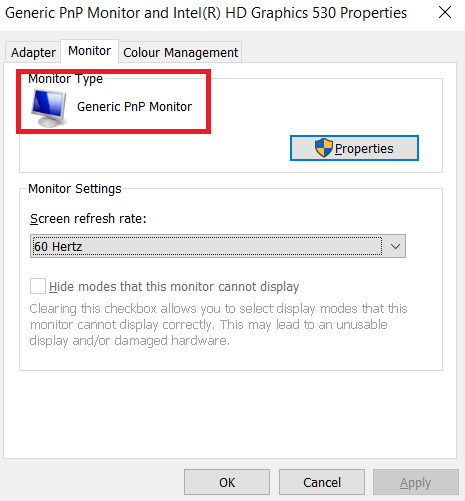
Next, click Monitor to see your monitor name.
If you are on a laptop, it may say Generic PnP Monitor. In this case, you’ll need to skip this step and move onto the Windows 10 calibration settings in the next step. Once you have your monitor name, simply search Google for ‘Monitor model’ optimal display settings. Replace ‘monitor model’ with your own model. You should find some excellent guides in different communities and forums. Once you’ve done that, make sure to come back here for our next tips on how to improve your display settings from within Windows 10.
How To Improve Display Settings Within Windows 10
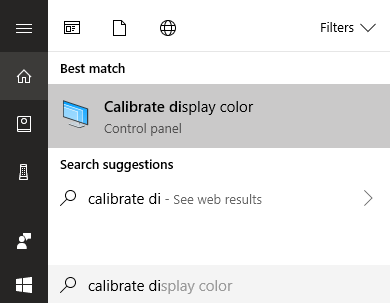
It’s very easy to learn how to improve your display settings within Windows 10. We’ll take you through the steps below. To begin with,open the Windows Start Menu and type calibrate display color.
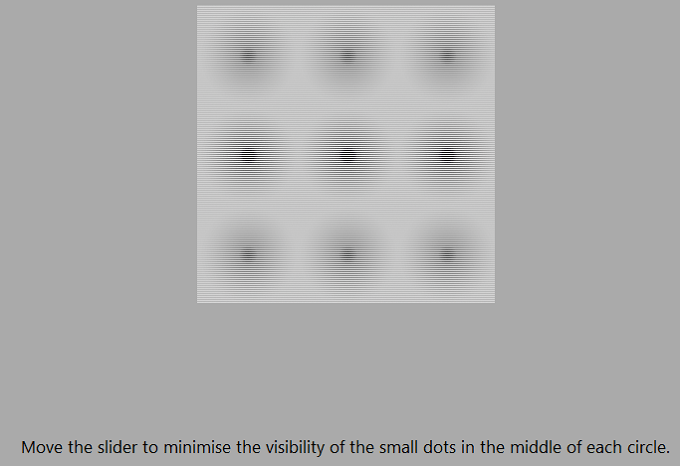
Click on the result that appears. You can then go through the Windows 10 color calibration wizard. This will show you whether the colors on your display are accurate or not, and you’ll get to adjust your display if they aren’t. As you can see below, you’ll be taken through different tests that will help you to calibrate your gamma and color balance. Some settings you can edit directly within the wizard and others will require you to edit the display settings directly on your monitor. For full details, read my previous post that walks you through every step of the display calibration process on Windows.
This is mostly the extent of what you can do for improving the color accuracy on Windows 10. You can also adjust the brightness and resolution by typing display into the Start Menu and opening Change Display Settings.
Improving Your Display Quality Further With Your Video Card Drivers
So far, we have covered how to improve your display settings on your monitor itself and on Windows 10. Both of these steps are excellent for improving the color accuracy and ensuring you get the very best out of your monitor. However, if you would like to amp things up with more contrast, more brightness, or more vibrant colors, you’ll need to change display settings through your graphics drivers. Keep in mind that these changes can impact your color accuracy – if you want the best color accuracy, you should keep the default settings. There are two main players in the graphics card industry – NVIDIA and AMD. We’ll be taking you through how to change your display settings on both.
How To Improve Display Settings Further With NVIDIA
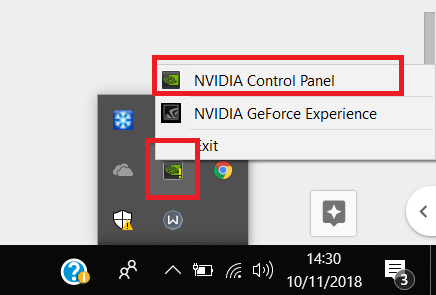
To begin with, you must open the NVIDIA control panel. To do this, click the Show Hidden Icons button on the far right of your taskbar.
Next, right click the NVIDIA icon in the hidden icons section. After that, you can click on NVIDIA Control Panel.
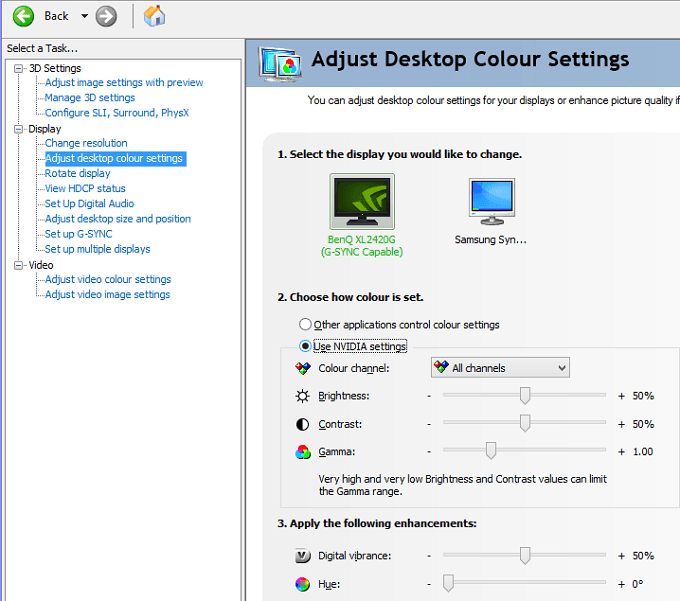
Once inside the NVIDIA Control Panel, you can click Adjust desktop color settings and from there you will have a number of sliders to control.
It’s up to you how you’d like to set your display settings here. Adding brightness, contrast, gamma, and digital vibrance can make colors pop out more in video games and movies. If you want more saturation and more vibrant colors, you can adjust these settings. (More specifically, contrast and digital vibrance.)
How To Improve Display Settings Further With AMD
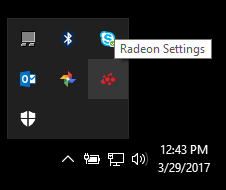
If you have an AMD graphics card, you can follow the steps listed below to improve your display settings further. Because I own an NVIDIA graphics card, image credit goes to AMD support for the images we are using to explain the process. First, click the hidden icon option in the Windows 10 taskbar.
Next, click the Radeon Settings icon in your icon tray.
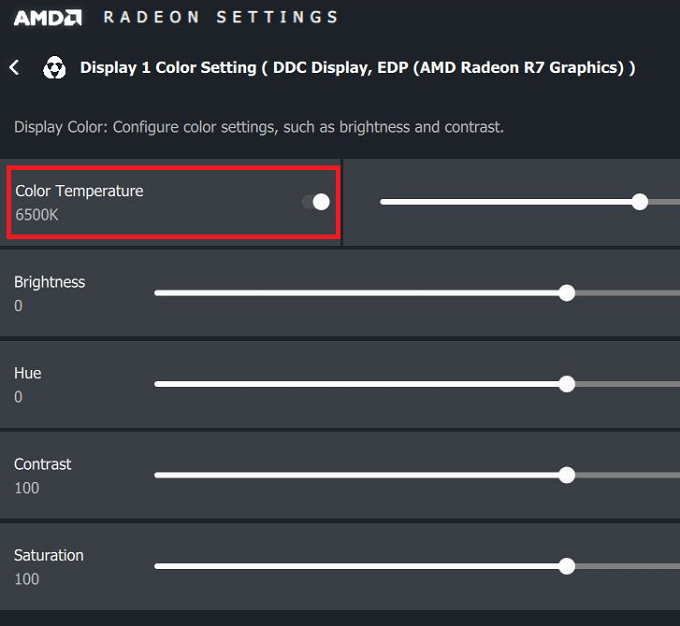
You will now be taken to the AMD Radeon Settings app. Click the Display tab to be taken to the right location. Once you are in the Display section, you can click Color to have more control over your display appearance. Keep in mind that this setting is unfortunately not available to all AMD graphics cards.
On the following page, you’ll have the option to control your brightness, hue, contrast, and saturation. To improve the digital vibrance in games and movies, you should use the contrast and saturation sliders.
Summary
I hope that this guide on how to improve your Windows 10 display quality has proven to be useful. Now that you’ve gone through this guide, do you notice any improvements to your display? Let us know your experience. Enjoy!


