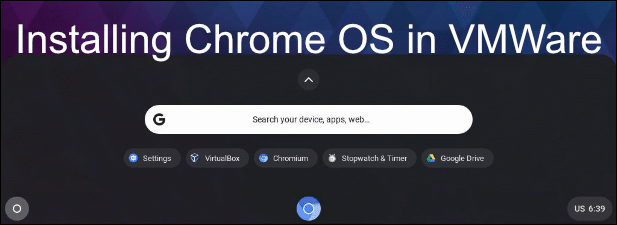
It’s entirely possible to try the Chromebook experience as a virtual machine in VMWare. Technically, you’ll need to use Chromium OS, the open-source alternative to Chrome OS. It lacks a few features, but it’s otherwise identical and should give you a flavor of the Chromebook experience.
What Is Chromium OS?
Open-source fans may already know that the Google Chrome browser is based upon a project called Chromium. While the code for Chrome itself isn’t shared, large parts of it are based on Chromium, allowing Google to “lock down” other, Chrome-only sections of code. The same process applies to Chromebooks, which run Chrome OS, based on the wider Chromium OS project. Much of the code is the same, but Chrome OS includes a few extra features like Android app support that you won’t find in Chromium OS. Chrome OS isn’t available for download, so non-Chromebook users can’t try it directly. The reasons for this are partly commercial—Google wants you to buy its Chromebooks, after all. There are also some features that Google is able to include in Chrome OS, like support for certain audio codecs, that can’t be included in Chromium OS for licensing reasons. Thankfully, Neverware CloudReady is a project that takes the Chromium OS base code and adds additional support to make it a more usable operating system on non-Chromebook devices. You can install this edition of Chromium OS to your PC or laptop directly, although you should check Neverware’s supported device list to check how well your device is supported before you begin. Rather than do this, we’ll explore how to install CloudReady Chrome OS as a VMWare virtual machine instead.
Install Chrome OS on VMWare
VMWare allows you to run a virtual machine, with its own isolated virtual hardware and storage, on top of your existing operating system. Installing Ubuntu in Virtualbox, for instance, would give you access to Linux on top of Windows or macOS. You can do this temporarily to test a new system out, or to run two operating systems at the same time over a longer period. Thanks to Neverware CloudReady, you can to test and try out the Chromebook experience without committing to it.
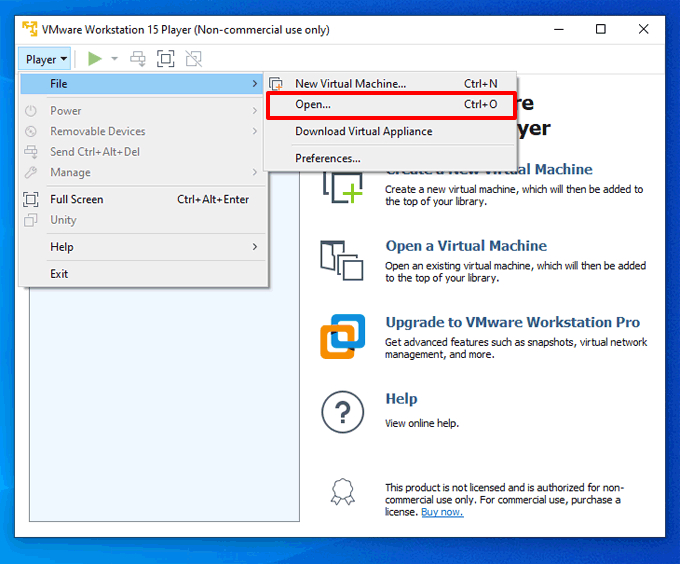
You’ll first need to download and install VMWare Workstation Player, available for free, non-commercial use on Windows and Linux. Once installed, download the VMWare image for CloudReady to your PC. You’ll also need to make sure that virtualization is enabled in your BIOS/UEFI settings.In VMWare Workstation Player, click Player > File > Open. Locate the CloudReady OVA file, select it, then click Open.
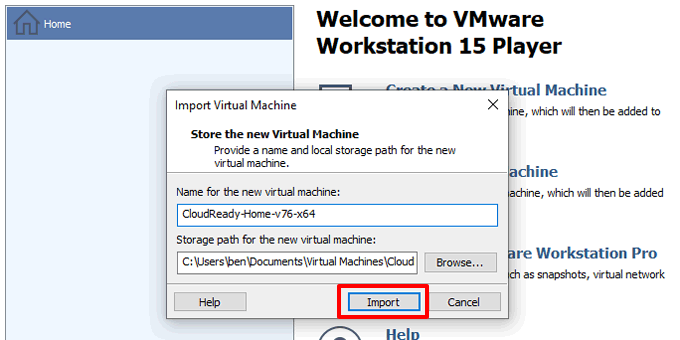
Give your CloudReady virtual machine a name (or leave the default name intact), then click Import. This will import the virtual machine image and settings to VMWare Workstation Player.
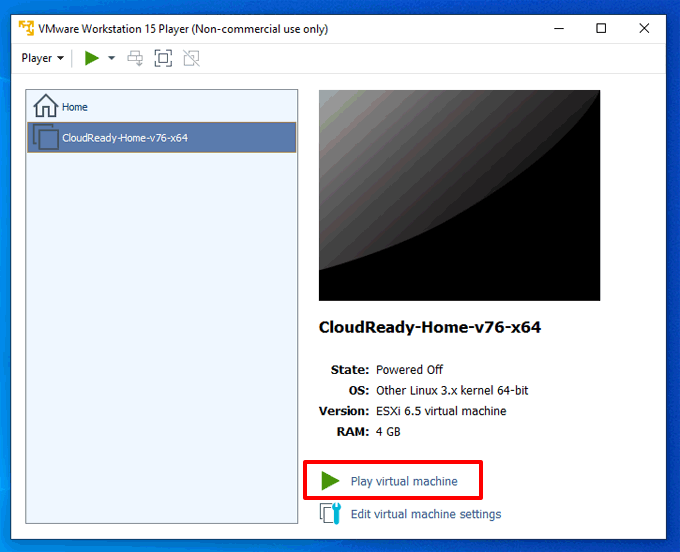
Wait for the import process to complete, which may take a minute or two, depending on your PC. Once completed, select your virtual machine and click Play virtual machine to turn it on.
If your PC is correctly set up for virtualization, VMWare Workstation Player should load CloudReady in seconds. You can then begin the setup process.
Setting Up Chromium OS
When you first boot ChromeReady, you’ll be presented with a setup screen. Chromium OS, like all Chromebooks, requires you to have a Google account to be able to sign in and use it. If you don’t have one already, create a Google account now, then return to the CloudReady virtual machine.
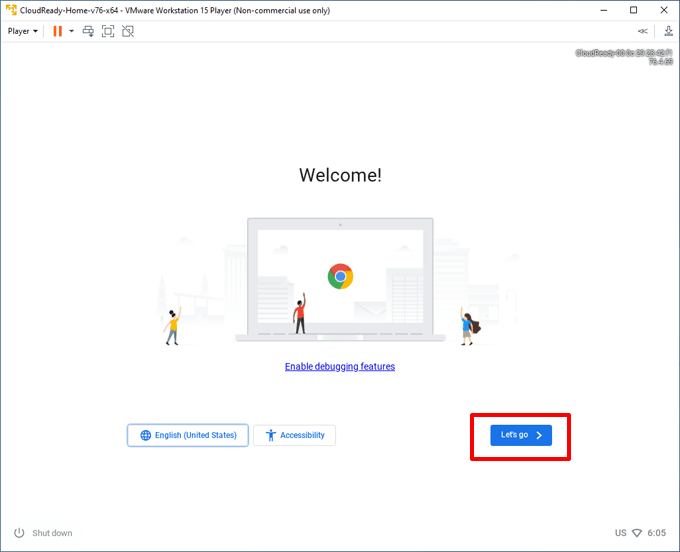
At the CloudReady welcome screen, click Let’s go to begin the setup process.
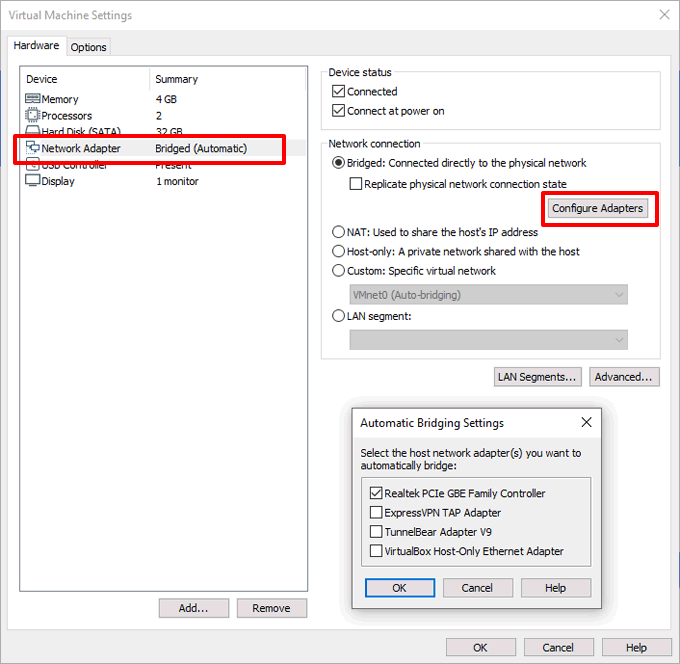
VMware will attempt to set up your network connection. VMware will usually share your host internet connection with the CloudReady virtual machine automatically. If this doesn’t work, check that VMWare is sharing the correct connection by clicking Player > Manage > Virtual Machine Settings > Network Adapter > Configure Adapters and ensuring the correct adapter is selected.
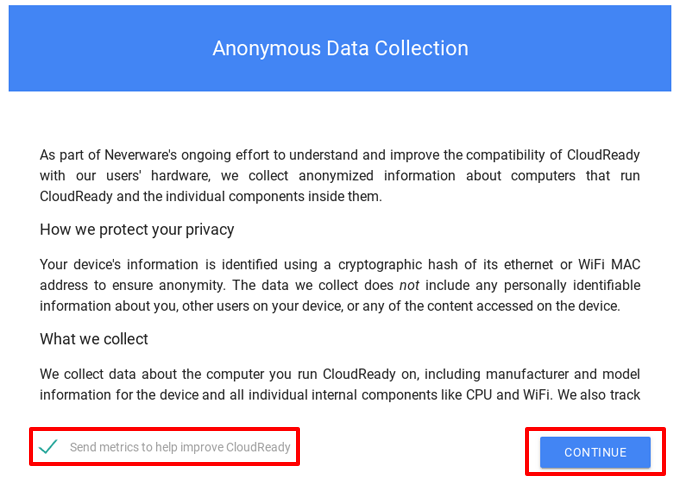
Confirm whether or not you want to provide anonymous analytics to Neverware by checking or unchecking the Send metrics to help improve CloudReady box at the next stage. Click Continue to proceed.
Sign into CloudReady using your Google account details at the final stage. Once you’ve signed in, CloudReady will automatically sign in, configuring the Chromium browser to add your extensions, bookmarks, etc.
Using Neverware CloudReady
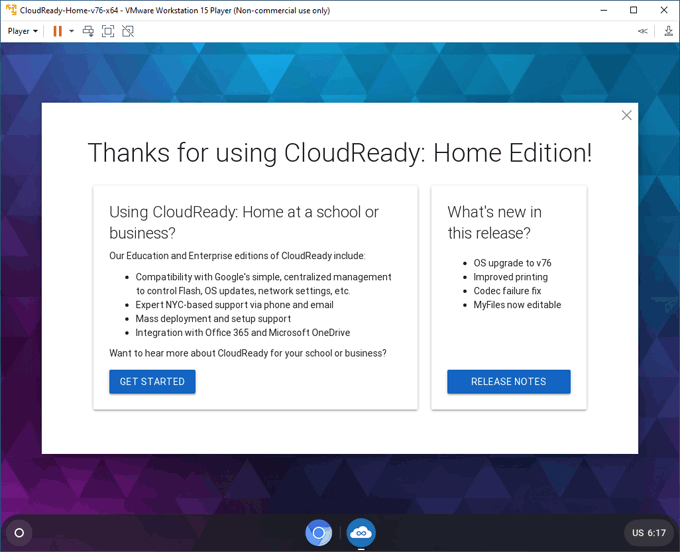
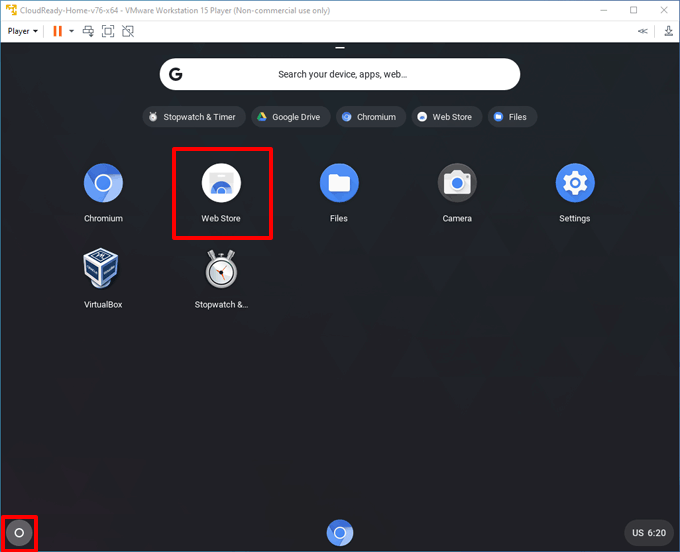
Your CloudReady Chromium OS virtual machine will work and appear very similar to a typical Chromebook. Click the circular menu icon in the bottom-left to access your apps, settings, and files, as well as install new apps from the Chrome Web Store.
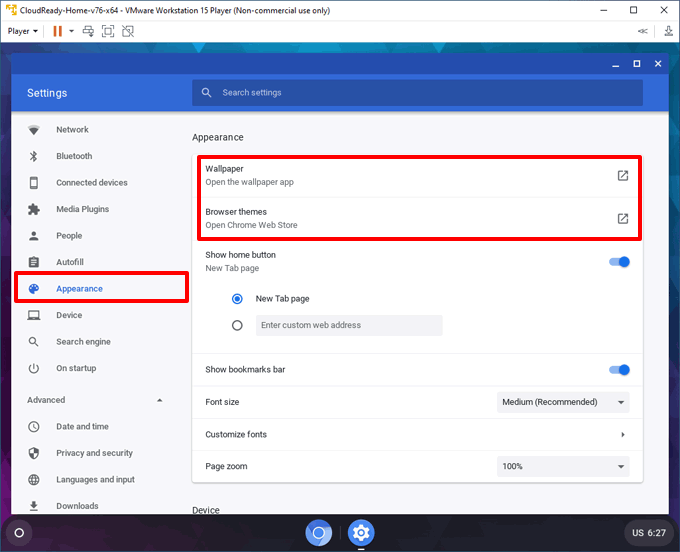
To configure your CloudReady experience further, click Menu > Settings. This will bring up a Chrome-like settings screen, where you can configure your network settings, connect Android devices, and install third-party media plugins. You can also change the background and theme in use by clicking Menu > Settings > Appearance > Wallpaper or Appearance > Browser themes. If you choose to add a new theme, you can download these from the Chrome Web Store.
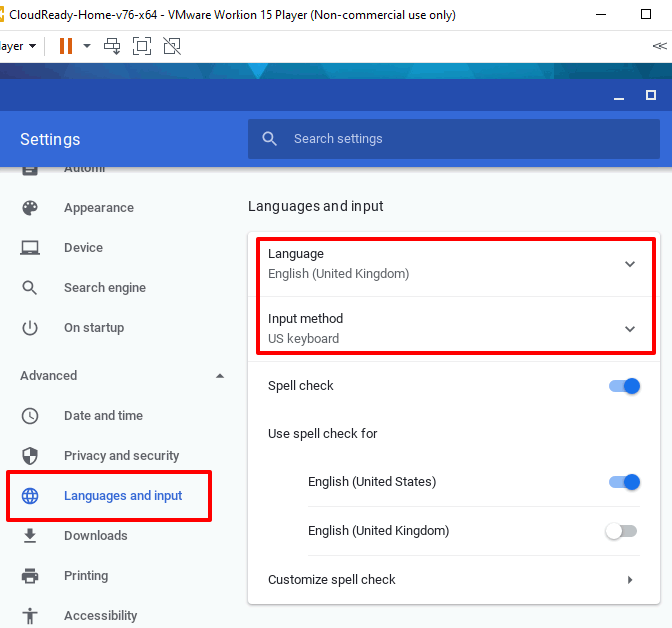
By default, Neverware CloudReady will default to an American timezone and keyboard configuration. You can change this by clicking Menu > Settings > Language and input. Click Language to set your language, and Input method to choose a different locale for your keyboard.
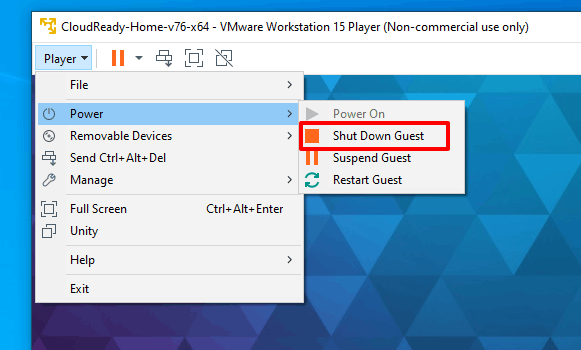
Once you’re finished trying CloudReady, click Ctrl + Alt on your keyboard to be able to move your cursor outside of the CloudReady screen, then click Player > Power > Shut Down Guest to switch the virtual machine off.
Trying the Chromebook Experience
By installing Chrome OS in a VMWare virtual machine, you can begin to understand the differences between Chromebooks and PCs before you decide to buy your own. While the experience can be similar, there are differences you need to be aware of, including storage limits and app support. If the Chromebook experience isn’t for you, you could install other operating systems in VMWare Workstation and give them a try instead.
