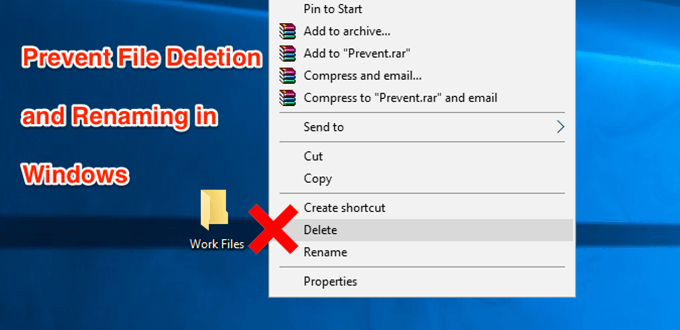
Safeguarding these important files is a task in itself. Although Windows doesn’t protect your files by default, it does offer an option that helps protect your files from any deletion attempts. In fact, there are multiple ways both in-built as well as third-party ones that help keep your files from getting modified on your computer.
Prevent Files From Being Deleted Using The Default Option
The best way to prevent file renaming and deletion in Windows is to use the default option available on your system. It requires no installation and can easily be accessed and used even by beginners.
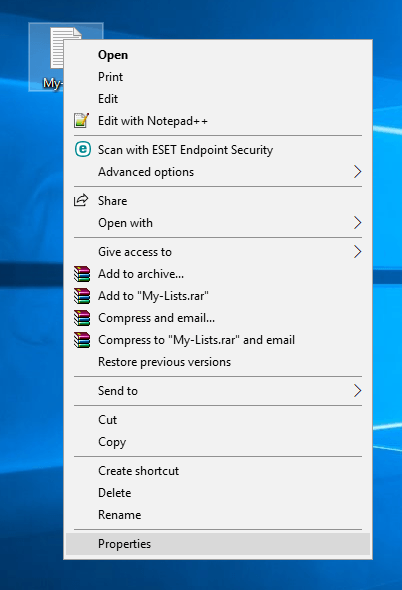
Locate the file that you want to prevent from being deleted in File Explorer. Right-click on the file and select the option that says Properties.
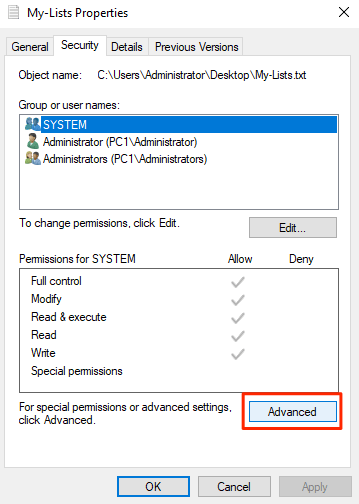
When the properties dialog box opens, you’ll see four tabs at the top. Click on the tab that says Security as the option you’re looking for is located there.In the Security tab, you’ll find a button saying Advanced at the bottom. Click on it and it’ll open a new dialog box.
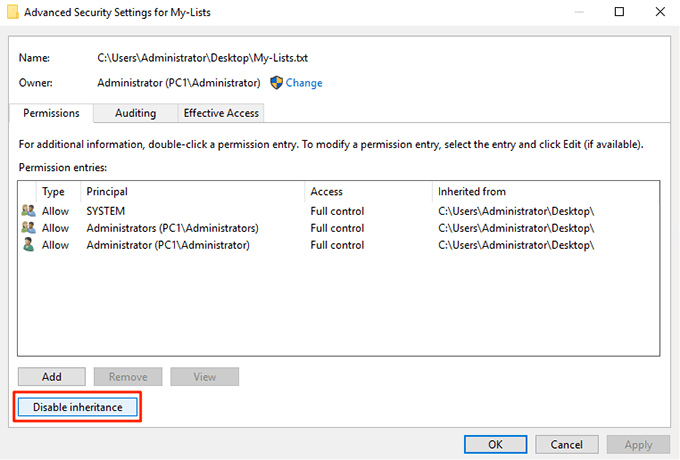
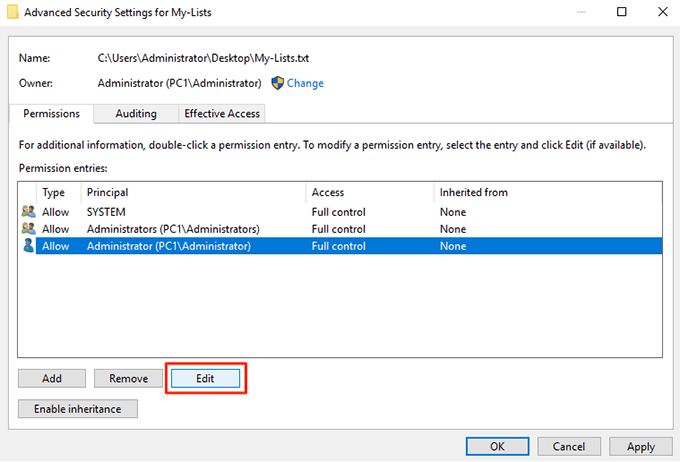
The following screen lets you define permissions for your selected file. Click on the Disable inheritance button to be able to modify the file permissions.
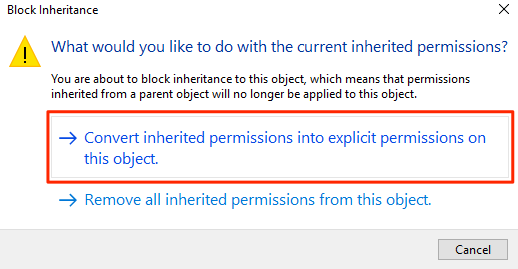
A prompt will appear with two options in it. Select the one that says Convert inherited permissions into explicit permissions on this object.
You’ll now see all of your user accounts listed on your screen. Click on the account that you want to prevent from deleting your file and then click on the Edit button. It’ll let you edit the file permissions for your selected account.
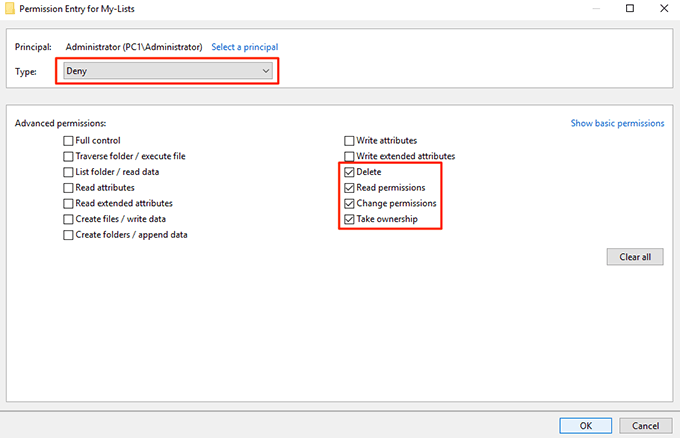
Make sure to click on Show advanced permissions on the following screen so you can see all the available permissions. Also, select Deny from the Type dropdown menu.Then, tick-mark the following options and these permission privileges will be taken away from your selected user account.A) Read permissionsB) Change permissionsC) Take ownershipD) DeleteClick on OK when you’re done to save the changes
Click on OK on the following screen as well and then exit all the open dialog boxes on your computer.
Your selected file is now protected from being modified, renamed, or deleted on your PC. If the user you’ve denied access tries to delete the file, they’ll get a permission error and they won’t be able to proceed with the task.
Prevent Files From Being Renamed And Deleted By Hiding Files
Another way you can prevent your files from being deleted or renamed is to hide your files. This way your files won’t appear in File Explorer and any other user won’t see it let alone deleting the file on your machine.
Hiding Your Files To Prevent Them From Being Deleted
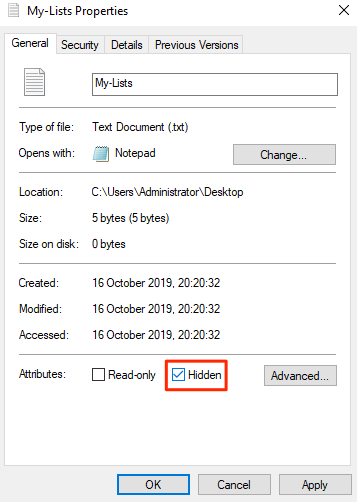
Right-click on your file and select Properties.You’ll be in the General tab by default. At the bottom of your screen, you’ll find an option saying Hidden. Tick-mark the option and click on OK.
Your file should now be hidden. If you have the option to view hidden files enabled on your machine, you’ll need to turn it off or your file will become visible.
Disable Viewing Hidden Files In Windows
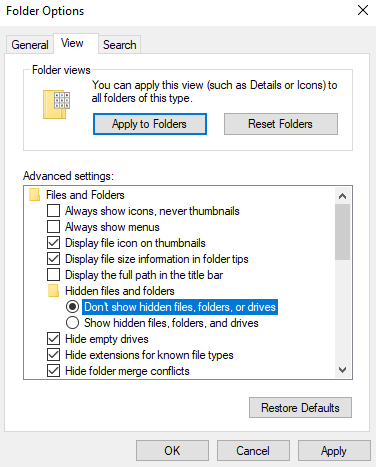
Open a File Explorer window on your PC.Click on the View menu at the top and you’ll reveal several new options. Find the option that says Options, click on it, and select Change folder and search options.
Click on the View tab in the dialog box that opens on your screen. Find the entry named Don’t show hidden files, folders, or drives and enable it. Click on OK to save the changes.
Your hidden file should now be completely hidden and it won’t be visible in the Explorer until the above option is enabled.
Use Prevent To Remove The File Delete And Rename Options
A user is able to delete or rename your files only because they get the option to do so in File Explorer. What if you could somehow disable the options that you don’t want in the Explorer menu so a user can’t even initiate any unwanted actions? Well, there’s an app that lets you do it. Meet Prevent, a small application that allows you to disable certain options in File Explorer on your computer. It lets you disable options like Rename, Delete, Cut, and Copy so no one can touch or modify your chosen files. It’s completely free to download and use this app on your computer. Also, it only occupies a small amount of memory space on your machine.
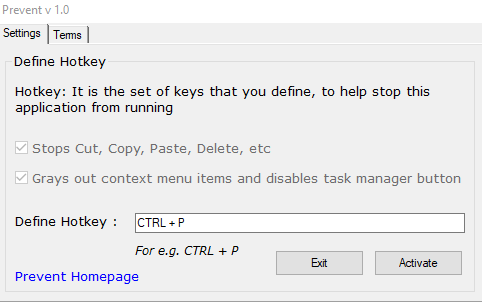
Download, install, and launch the Prevent app on your Windows PC.When the app launches, you’ll see that there’s only one option you can configure.It’s called Define Hotkey and it allows you to specify a keyboard shortcut that stops the app from running. Use any of the available keyboard shortcuts and then click on Activate.
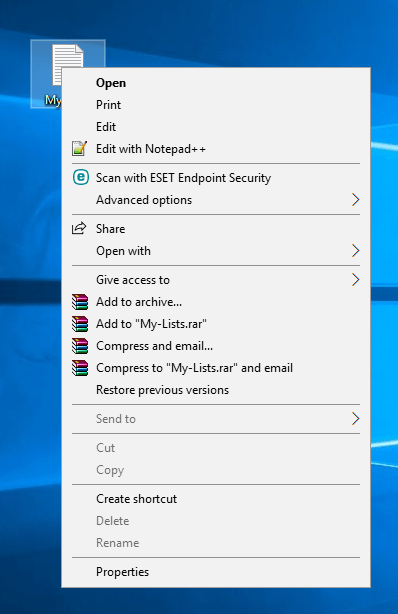
The app will start running, and when you right-click on your file, you’ll find that the options mentioned above are grayed out. You can’t click or use them. The app disables the physical buttons for those actions as well.
When you decide that it’s time to allow those options to be used, simply press the keyboard shortcut you assigned to the app and the app will stop functioning. You can then rename, delete, cut, and copy your file as you could do before.
