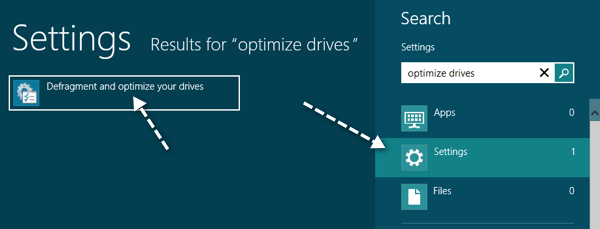
In Windows 8, you can open the Charms bar and search for Optimize Drives. Luckily, you can still search disk defragmenter and it will load the correct feature.
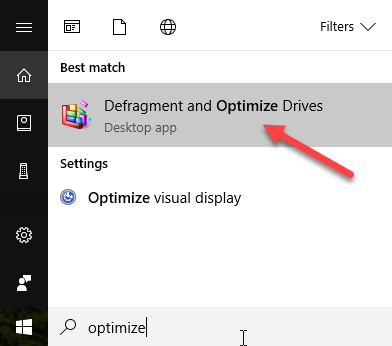
In Windows 10, if you click on Start and type in defragment or optimize, it will bring up the Defragment and Optimize Drives link.
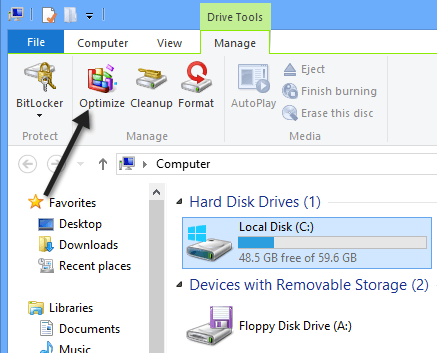
You can also get to the Optimize Drives feature by going to My Computer, selecting a drive, clicking on the Manage tab and then clicking on the Optimize button.
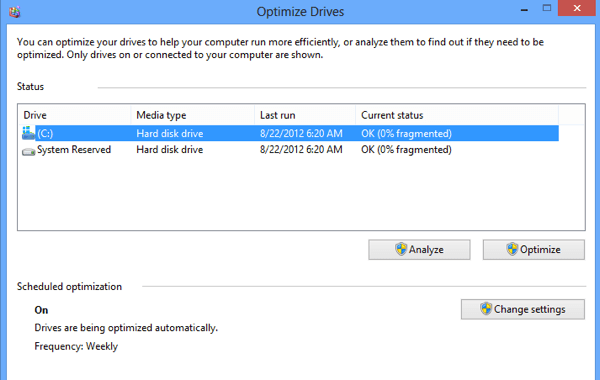
This will bring up the Optimize Drives dialog box where you will see a list of your drives and their current status (% fragmented).
In Windows 8/10, the drives are automatically scheduled for optimization on a weekly basis. You can manually optimize or defragment a drive in Windows 8/10 by selecting it and then clicking on the Optimize button.
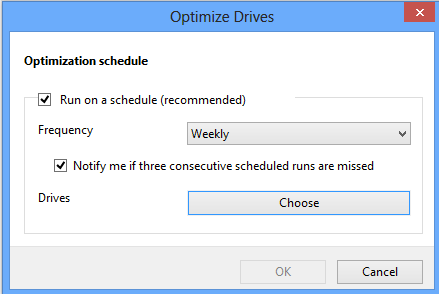
This will start the defrag process manually and you’ll see that Windows 8/10 does two passes to relocate fragmented data on the hard drive. You can also click the Analyze button to quickly update the percent fragmented value. It’s worth noting that Windows can tell if the drive is a regular hard drive or an SSD and will defragment appropriately. As I’ve written before, you shouldn’t defragment a SSD because it can reduce the life span of the device. If you want to change the automatic optimize schedule, click on Change settings.
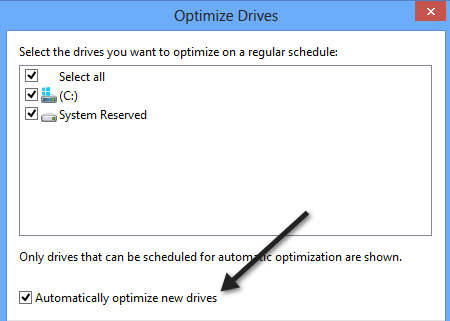
You can either remove the schedule so that automatic defragmentation is turned off or you can change it from weekly to daily or monthly. You can also choose all drives or a specific drive to change the schedule for. Lastly, if you click the Choose button, you can change whether you want new drives to automatically be scheduled for optimization also or not.
That’s about all there is to defragmenting disks in Windows 8 and Windows 10. For most people, the automatic schedule should work fine, but if you have a third party tool or simply don’t find defragmenting useful, you can always turn it off in the settings. Enjoy!
