Secure DNS, or DNS over HTTPS as it is technically known, is a feature for ensuring the privacy and security of your web browser. But what exactly is Secure DNS? How does it work? What are the steps to enable secure DNS in Google Chrome? We will answer all these questions in this article.
What is DNS?
We access the internet through alphanumeric web addresses. You can enter strings of text like “www.google.com” in the address bar of any browser to navigate to a website. The thing is, these addresses do not really exist. Computers, as a rule, only deal with numbers. Each connected machine is identified by its IP address on the internet, which consists solely of numerics. How then does internet browsing work? Using the Domain Name System (DNS). Simply put, DNS is an online directory matching domain names (like google.com) to their respective IP addresses. DNS servers are publicly accessible and are routinely used by web browsers to determine the correct IP addresses of websites.
Why is Traditional DNS Vulnerable to Cyberattacks?
The problem with DNS lookup operations is that they were never designed with security or privacy in mind. Any resourceful hacker can intercept your browser’s DNS requests, and respond with false information. Your browser can be diverted to a fake website or track your browsing activity. This can be carried out by a malicious ISP too, leaving your sensitive data in the hands of others.
The Solution: DNS Over HTTPS
The solution is simple: end-to-end encryption. You may know about the HTTPS protocol in use these days. An improvement over the standard HTTP protocol, these requests are encrypted. This prevents hackers from intercepting those requests and extracting any information from them. To secure your DNS requests similarly, you can enable DNS over HTTPS in Google Chrome. This feature is called secure DNS and is quickly becoming a new standard of security on the web. Keep in mind that this feature also depends on the DNS server and the website in question. Unfortunately, not all Internet Service Providers (ISPs) offer a secure DNS server or serve encrypted requests. Your best bet in these scenarios is to switch to a custom DNS server.
How to Enable Secure DNS in Google Chrome
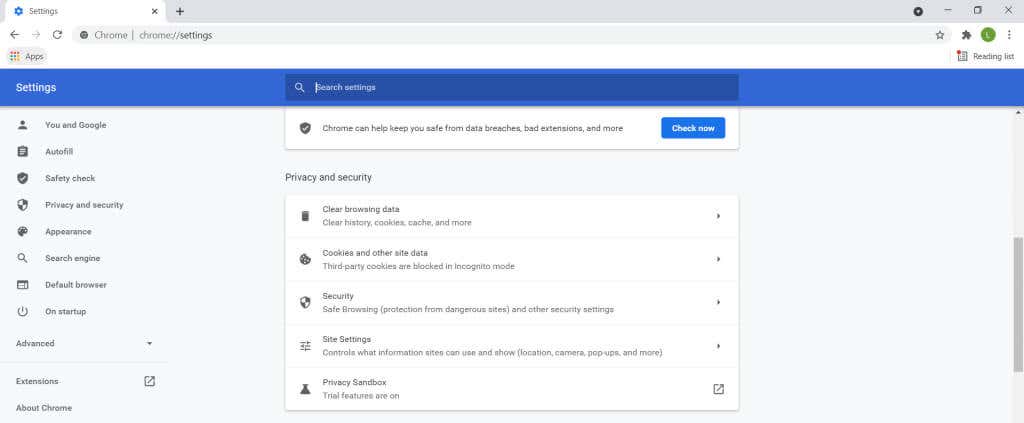
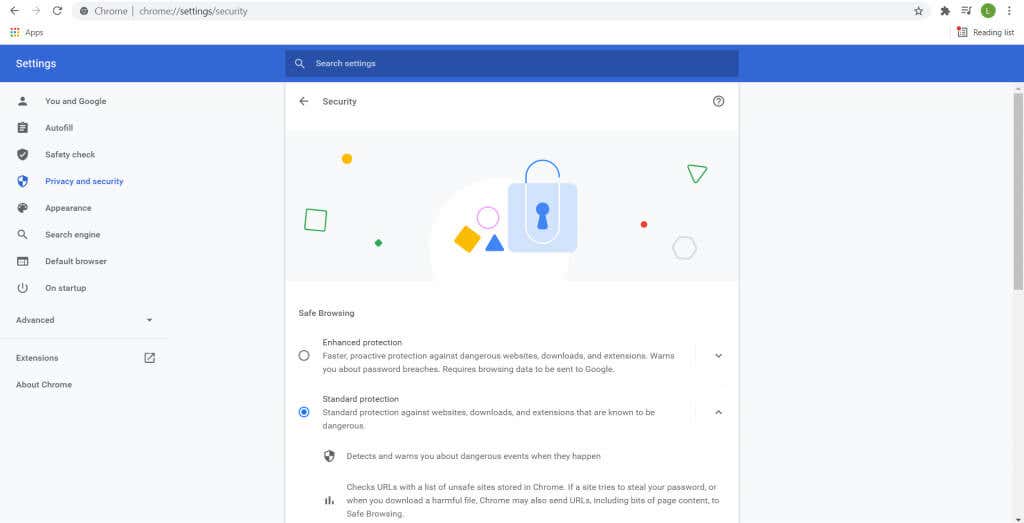
Originally, secure DNS was an experimental feature in Chrome. Activating it required navigating some hidden menus on the browser. Now though, secure DNS has been integrated into the normal functioning of Google Chrome.
Testing Secure DNS on Your Browser
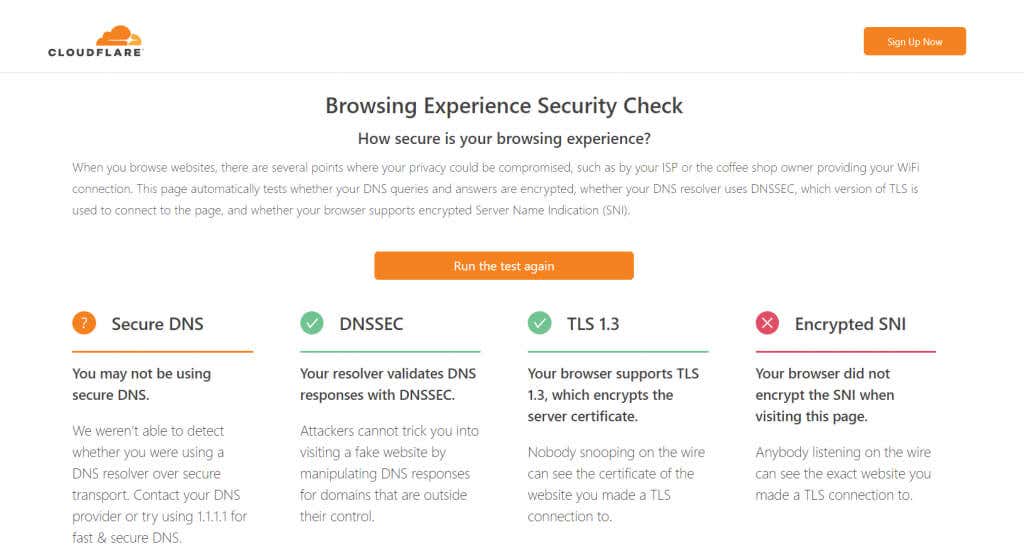
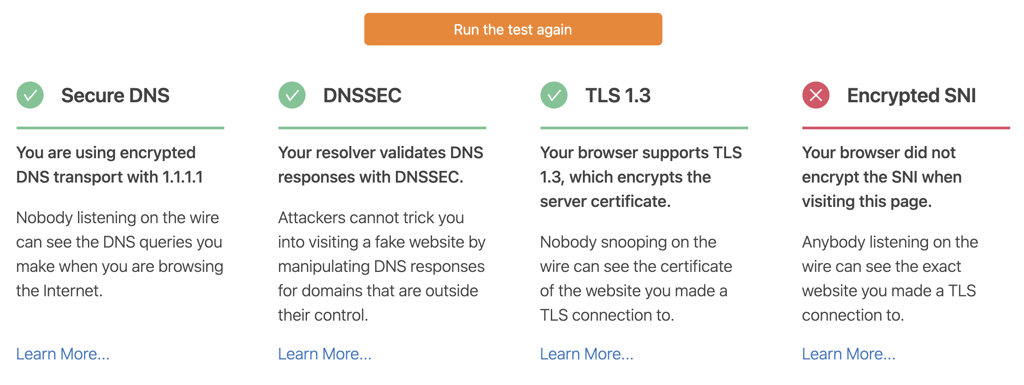
Simply enabling secure DNS on your browser isn’t enough. There’s no way to confirm that your DNS requests are being encrypted, leaving you in the dark about the real state of your security. This is a concern if you are using the DNS servers of your ISP. Not all Internet Service Providers have fully upgraded to the latest standards. This can give you a false sense of security while still operating without secure DNS. Fortunately, it’s easy to check whether your browser is using secure DNS or not. Many online tools verify the security status of your DNS requests without any software installation. For this guide, we will be using Cloudflare’s online utility. As you can see, the test was unable to detect Secure DNS. You can fix this by using a different secure DNS server or contacting your internet service provider. Once I enabled Google Chrome Secure DNS through CloudFlare, I was able to get a green check.
Is Secure DNS Necessary?
With hacking and cyberattacks rising day by day, security measures to combat them must evolve to keep pace too. Secure DNS is one of the easier ways to secure your privacy without any drastic changes. The DNS settings of your browser may seem like a small thing but is a crucial component of internet security. Malicious entities can mess up your DNS requests to track your activity or route you to dangerous sites. Enabling and testing secure DNS on your Google Chrome browser is thus necessary.

